Script to make common operations on piece images

Counter image manipulations

The script piece_manip.sh (Right-click and select Save link as …) allows for a number of manipulations of counter images. The syntax is in general

./piece_manip.sh [OPTIONS] INPUT ... 

where OPTIONS specify which operations to do, and INPUT ... is a number of input files. Try also

./piece_manip.sh --long-help 

for information on operations. If no output file is specified via option -o or --output, then for input file INPUT.EXT, the default output file name is INPUT_out.png.

The script uses ImageMagick, and is inspired by grouchysmurf’s, now defunct, web-page vassal.neocities.org (Wayback machine). Credit to that user for finding various useful operations.

This script is not meant to be omnipotent. Many more possible and sensible operations could be defined, and much more fancy stuff can be done with ImageMagick. Please refer to the document of ImageMagick, not least the extensive list of examples.

Note: The piece_manip.sh script is developed targeting ImageMagick version 7. The script may not work as intended with older versions of ImageMagick.

Overview

Some common notes

Colours

Any colour that Imagemagicks knows about can be used, or alternatively the colour can be given using HTML colour codes (#RRGGBB, where RR, GG, BB, are hexadecimal numbers between 0x00 and 0xFF, and corresponds to the red, green, and blue channels, respectively).

Sizes

Sizes are always given in image pixels.

Copyright

Typically, the publisher of the game holds the copyright on the materials of the game. While copyright can most likely not be claimed over game mechanics and design, it can be enforced on artistic and original work. Graphics, such as counters, maps, cards, etc. definitely fall in that category.

Thus, if you modify or redistribute such materials - counters, maps, cards, etc. - you should make sure that the copyright holders have given you license to do so, and you should explicitly provide that license. Otherwise, you are most likely liable for copyright infringement.

Crop images from counter sheet

./piece_manip.sh --extract N M [FLIP] INPUT ...

where INPUT is N columns and M rows of pieces. If FLIP is true, yes, 1, flip, flop, or back, then the order of pieces are reversed. This is useful when extracting images from the “back” counter sheet so as to reproduce the order of the images used on the front sheet.

Output file names are

INPUT_NUM.png

where NUM is a serial number, starting at zero, zero-padded to 3 digits - e.g., if the input file name is front_block.png, then the 6th extracted image will be named front_block_005.png.

Examples

./piece_manip.sh --extract 9 2 front_block.png 
./piece_manip.sh --extract 9 2 1 back_block.png 
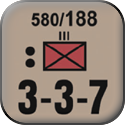
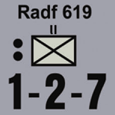
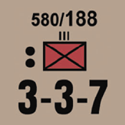
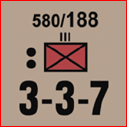
Input:

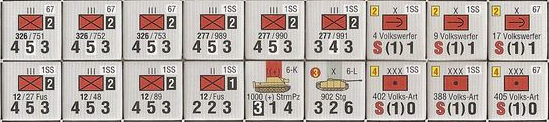
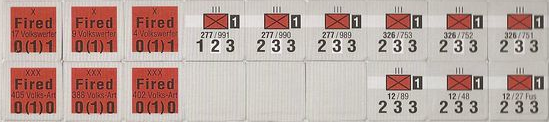
Given the counter sheets

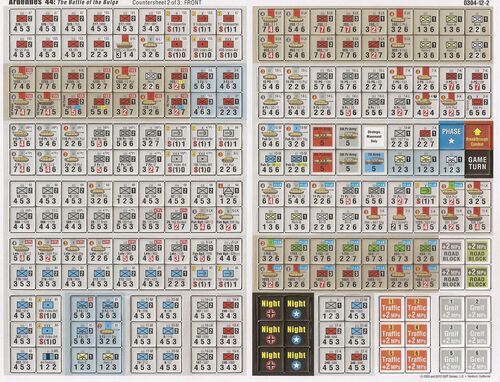
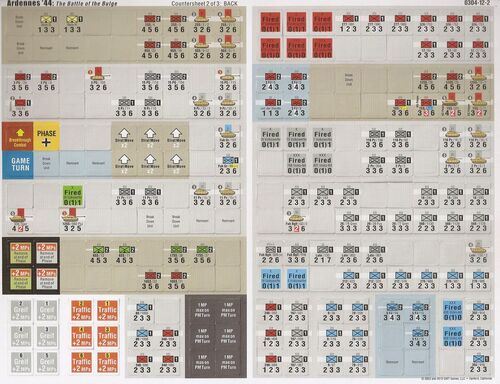
cut out the individual blocks, using for example Gimp, as shown below
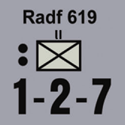
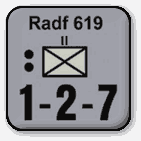
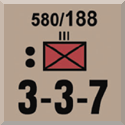
Output:

front_block_000.png front_block_001.png front_block_002.png front_block_003.png front_block_004.png front_block_005.png front_block_006.png front_block_007.png front_block_008.png
front_block_009.png front_block_010.png front_block_011.png front_block_012.png front_block_013.png front_block_014.png front_block_015.png front_block_016.png front_block_017.png
back_block_000.png back_block_001.png back_block_002.png back_block_003.png back_block_004.png back_block_005.png back_block_006.png back_block_007.png back_block_008.png
back_block_009.png back_block_010.png back_block_011.png back_block_012.png back_block_013.png back_block_014.png back_block_015.png back_block_016.png back_block_017.png

Bevel

./piece_manip.sh --bevel [SIZE] INPUT ...

Add a bevel (“button” effect) of size SIZE pixel to images. If SIZE is not specified it defaults to 4

Example

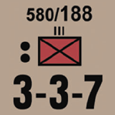
./piece_manip.sh --bevel 4 counter1.png -o counter1_bevel.png
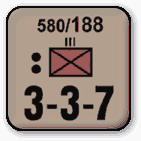
./piece_manip.sh --bevel 4 counter2.png -o counter2_bevel.png

Border

./piece_manip.sh --border [SIZE [COLOUR]] INPUT ...

Add a COLOUR-coloured border of size SIZE pixel to images. If SIZE is not specified it defaults to 4. If COLOUR is not specified, it defaults to black.

Example

./piece_manip.sh --border 1 red counter1.png -o counter1_border.png
./piece_manip.sh --border 1 red counter2.png -o counter2_border.png

Color

./piece_manip.sh --color [N [DITHER]] INPUT ...

Reduce the number of colours used by the image to N (defaults to 16). If DITHER is no, false, no-dither, 0, or off, then dithering is turned off (default is on). The purpose of this operation is to reduce the image size. For many images, the size can be reduced to about 25% of the original size.

Example

./piece_manip.sh --color 5 5 -o counter1_color.png
./piece_manip.sh --color 5 5 -o counter2_color.png

Crop

./piece_manip.sh --crop GEOM INPUT ...

Crop piece to geometry GEOM. GEOM has the format

WIDTHxHEIGHT[+/-X+/-Y]

where WIDTH and HEIGHT are the new width and height, respectively, and X and Y are the horizontal and vertical offsets, respectively, with respect to the centre of the image.

Example

./piece_manip.sh --crop 100x100 -o counter1_crop.png
./piece_manip.sh --crop 100x100 -o counter2_crop.png

Drop

./piece_manip.sh --drop [SIZE [COLOUR [FADE [OPACITY]]]] INPUT ...

Add a COLOUR-coloured drop-shadow to images. If COLOUR is not specified, it defaults to gray7. If FADE is positive, then the shadow will fade of that many pixels. OPACITY sets the opacity of the start of the drop-shadow. SIZE defaults to 4, FADE to 0, and OPACITY to 60.

Example

./piece_manip.sh --drop 2 "#11111e" 4 counter1.png -o counter1_drop.png
./piece_manip.sh --drop 2 "#11111e" 4 counter2.png -o counter2_drop.png

Edge

./piece_manip.sh --edge SIZE INPUT ...

Add a SIZE pixels to the top and bottom of the images. The colours of these extra pixels are copied from the edge of the image.

This is similar to the --expand operation below, but unlike that operation, it does not smear the edge pixels by sampling. Therefore, this operation is more suitable if the edges are not relatively uniform.

In some sense, this is the reverse of --shave.

Example

./piece_manip.sh --edge 2 counter1.png -o counter1_edge.png
./piece_manip.sh --edge 2 counter2.png -o counter2_edge.png

Expand

./piece_manip.sh --expand SIZE INPUT ...

Add a SIZE pixels to the top and bottom of the images. The colours of these extra pixels are sampled from the edge of the image.

This is similar to the --edge operation above, but unlike that operation, it does not copy the edge pixels, but rather smears the colours by sampling. Therefore, this operation is more suitable if the edges are relatively uniform.

In some sense, this is the reverse of --shave.

Example

./piece_manip.sh --expand 2 counter1.png -o counter1_expand.png
./piece_manip.sh --expand 2 counter2.png -o counter2_expand.png

Outline

./piece_manip.sh --outline [COLOUR] INPUT ...

Add a COLOUR-coloured outline to images. If COLOUR is not specified, it defaults to black.

Example

./piece_manip.sh --outline blue counter1.png -o counter1_outline.png
./piece_manip.sh --outline blue counter2.png -o counter2_outline.png

Rounded

./piece_manip.sh --rounded [SIZE] INPUT ...

Make the corners of the images rounded. The radius is set by SIZE. SIZE defaults to 16.

Example

./piece_manip.sh --rounded 16 -o counter1_rounded.png
./piece_manip.sh --rounded 16 -o counter2_rounded.png

Shade

./piece_manip.sh --shade [SIZE [ANGLE [ELEVATION]]] INPUT ...

Add a smooth bevel to the image of size SIZE. The shade is drawn as if the light-source is at the angle ANGLE and elevation ELEVATION (both in degrees, and defaults to 135 and 30, respectively). Note that ANGLE is in the range 0 to 360 and ELEVATION in the range 0 to 90, though the extremes should be avoided.

Example

./piece_manip.sh --shade 5 -o counter1_shade.png
./piece_manip.sh --shade 5 -o counter2_shade.png

Shave

./piece_manip.sh --shave X Y INPUT ...

Shave off from left and right, top and bottom of the image. X is the number of pixels to remove both from the left and right edges, while Y is the number of pixels to remove from the top and bottom edges.

Example

./piece_manip.sh --shave 5 5 -o counter1_shave.png
./piece_manip.sh --shave 5 5 -o counter2_shave.png

Combining manipulations

The above manipulations can be combined. That is, one can specify multiple operations for a single image file. The will then be applied in the order given. Note that the order matters.

Example

./piece_manip.sh         \
    --bevel 8            \
	--rounded 16 	     \
	--outline black	     \
	--drop 2 "#11111e" 4 \
    --color 16           \
	-o counter1_fancy.png counter1.png
./piece_manip.sh         \
    --bevel 8            \
	--rounded 16 	     \
	--outline black	     \
	--drop 2 "#11111e" 4 \
    --color 16           \
	-o counter2_fancy.png counter2.png

Note, the option --color 16 reduces the final image size to just over 25% if that option had not been specified, and a roughly 40% of the original image. If instead --color 32 had been specified, then the final size would be roughly 50% or the original image size.

License

The script piece_manip.sh is licensed under the GNU General Public License version 3, or later. See also LICENSE.

2 Likes

Hi Christian,

Thank you for such a comprehensive and well thought out utility. The comprehensive documentation is a great feature.

My only observation is that the use of the ‘magick’ command in the script requires the installation of ImageMagick V7. Unfortunately Ubuntu and other Debian based distributions only have V6 in their repositories.

I am aware the accepted solution is to download the source and compile a V7 installation (which would be a worth while exercise) but it might be a bit daunting for a new user.

Would it be worth considering a ImageMagick V6 version of this script (as not all the features are used) or possibly an auto detect version which it would work ‘out of the box’ for these distributions?

(Possibly just as simple as conditional substitution of ‘convert’ for ‘magick’).

Just a thought,
Reg.

1 Like

Glad you find it useful.

I’m on Debian GNU/Linux “sid” - and has been since 1996 - and there magick is available :slight_smile:

Since imagemagick does not have that many dependencies, you may also be able to install the sid (unstable) package (most dependencies comes from libmagickcore-7).

It would be great to have the piece_manip.sh script be compatible with ImageMagick 6. However, I’m not that familiar with the tool to know exactly what the differences are between v6 and 7. So …

… if you could give that a try, that would be great. You can check out the script by

$ git clone https://gitlab.com/wargames_tex/vassal_my_contrib.git

The script lives in the imagemagick sub-directory. You will only need to change magick to convert in line 610. You can then do

$ make clean 
$ make 

in that directory to test your changes. Please report back your findings. Thanks.

Yours,
Christian

[/quote]

Hi Christian,

Substituting the convert command into the script works just fine for ImageMagick V6 with the single exception of the --rounded operation which throws an error of:
convert-im6.q16: invalid argument for option `-size': %[fx:w]x%[fx:h] @ error/convert.c/ConvertImageCommand/2763.

I didn’t think there would be a great difference between the versions but obviously there are some subtleties. When I get some time tonight I’ll see if I can get that to work.

As far as the repositories go I think the issue is with the Ubuntu repositiory which only contains V6. I am using ZorinOS which is buillt over the top of a Ubuntu baseline. I believe the Mint distribution is similar. Installing a ImageMagick V7 on these distributions is not difficult and well documented but I thought it would be desirable for this utility just to work ‘out of the box’ for as many users as possible.

By the way, have you implemented the --expand operation shown above? It doesn’t appear to be in the script.

Thank you again for your great contributions,
Reg

Hi Reg,

Yep, I saw that too with convert from ImageMagick 7 - so consistent across versions - so far so good.

The big change seems to be that v7 allows you to put expression in arguments to the various ImageMagick operations - e.g.,

-size %[fx:w]x%[fx:h] 

which v6 (or v7 convert) does not allow for.

I’ve made a work-around in the script for the pesky --rounded operation. A bit of a hack (see the script for some thoughts on this).

For people that are not hype about rebuilding software, I though it might be worth trying the sid packages. That’s all. I guess we’re not all on the edge (if you can call sid “the edge” - after all its more stable than RH has ever been - going crazy is Gentoo or Debian “experimental” - still, beats Windoze and MacOuze. Oh, and in case people are wondering why “unstable” is called “sid”).

It should have been there - did you re-download the script? I cannot push stuff on to your machine (or … can I? :wink: ) Anyways, the fix above have been pushed, and so the --expand option should definitely be there now - just re-download using the link at the top of the top post.

Yours,
Christian

Hi Christian,

Yes, downloaded again via the git command. Script now has --expand.

A couple of minor things
Line 121 should say ‘rounded’ instead of ‘rounced’. Typo only.
Line 17 should have ‘$cmd’ instead of ‘magick’ for V6.

The good news is that the rounded operation works great now with V6. :slight_smile:
Unfortunately the dreaded -size error returns when you use combined operations. :frowning:

The bad news is that though the expand function does create a larger image of the correct size there seems to be an issue with V6 -morphology. :frowning:

I’m not sure if it is just me (or my ImageMagick installation) but it appears that if you make the border color ‘none’ then the additional size remains transparent. I can see what you are attempting to do when filling the new area but under V6 the -morphology step then acts on edges within the original image, rather than the border edge turning the original image into negative color image. Obviously image processing is the big difference between V6 & V7.

In summary, the script works great for V6 for everything except -expand. Maybe we should take any further investigation off line to avoid cluttering this thread. Or recommend updating to V7 which isn’t that difficult. :slight_smile:

Cheers,
Reg

1 Like

Hi Reg,

Thanks. Fixed. Should be available from GitLab.

OK. Given I don’t have ImageMagick version 6 installed, there’s little I can do about the problem with --expand. If you, or anyone else, come up with something, I will gladly put it in.

But for now, I’ve put in a warning so people are aware of it.

If you have specific recommendations for upgrading, please do not hesitate to give them.

Yours,
Christian

Hi Christian,

Thank you for the update as those changes are very useful (though line 585 may need a closing parenthesis for the case statement). :slightly_smiling_face:

I’ll start with a success. The -size error I encountered when using the --round operation in a combined manipulation can be avoided by simply calling it first!! This makes sense as you would want to round the corners before applying the other operations. It isn’t really compatible with --bevel.

Perhaps we should make this clearer in the long help by using the following description and moving it to second in order (after --extract).

	  --rounded [SIZE]
	
	        Round the corners of the images.  The radius of the
	        rounding will be SIZE.	SIZE defaults to 16.  This 
	        should be the first operation listed in a combined 
	        manipulation so later effects are applied over this. 
host:~/vassal_my_contrib/imagemagick$ ~/Vassal_Mods/piece_manip.sh  --rounded 25 --outline --shade counter2.png
host:~/vassal_my_contrib/imagemagick$

============================================

Now the difficult bit. :neutral_face: The following command generates the image below with V6. Note the transparent expanded area and that the -morphology step seems to be processing the edge around the unit symbol not the edge of the original image. I do not understand what is going on.

host:~/vassal_my_contrib/imagemagick$ ~/Vassal_Mods/piece_manip.sh -v --expand 10 counter1.png 
Operations are: 'expand'
Input files are: ' counter1.png'
 Operation: expand
Warning: Expand may not work with ImageMagick 6.9.11-60
Arguments are  -background none -bordercolor none -border 10 ( +clone -morphology edgeout square:20 ) -compose over -composite
Input counter1.png -> counter1_out.png
  /usr/bin/convert counter1.png -background none -bordercolor none -border 10 ( +clone -morphology edgeout square:20 ) -compose over -composite counter1_out.png
done
host:~/vassal_my_contrib/imagemagick$

I wonder if we could take an alternative simplified approach for V6 (only) and just fill -bordercolor with a pixel color from the corner of the original image. This will probably work with typical simple unit counters (such as your examples) but will still not handle complex counter images which may have to be done manually. Limitation of still using V6. I may have some time this weekend to play around and I will get back to you if I come up with something useful.

I hope you find this useful,
Reg.