Network game setup
These are for when you want to run a game either using the central Vassal server or via a private server instance. If you want to run a peer-to-peer game, see these instructions
Setup for Vassal central server
Suppose we have two clients A and B, and two users seek to
play the module Battle for Moscow
If you want to run a game with more than two players, then follow these instructions duplicating the instructions for client B as needed.
To set up a game using the Vassal central server, follow the following procedure.
On both clients
-
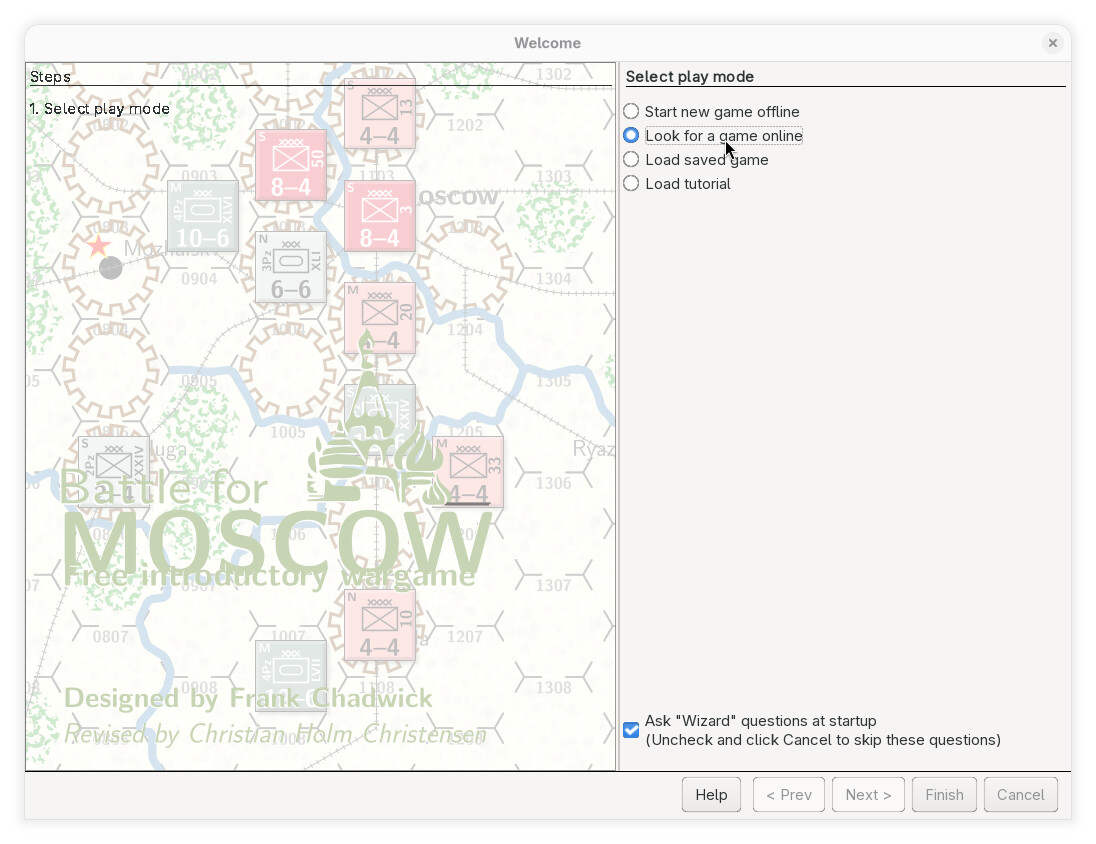
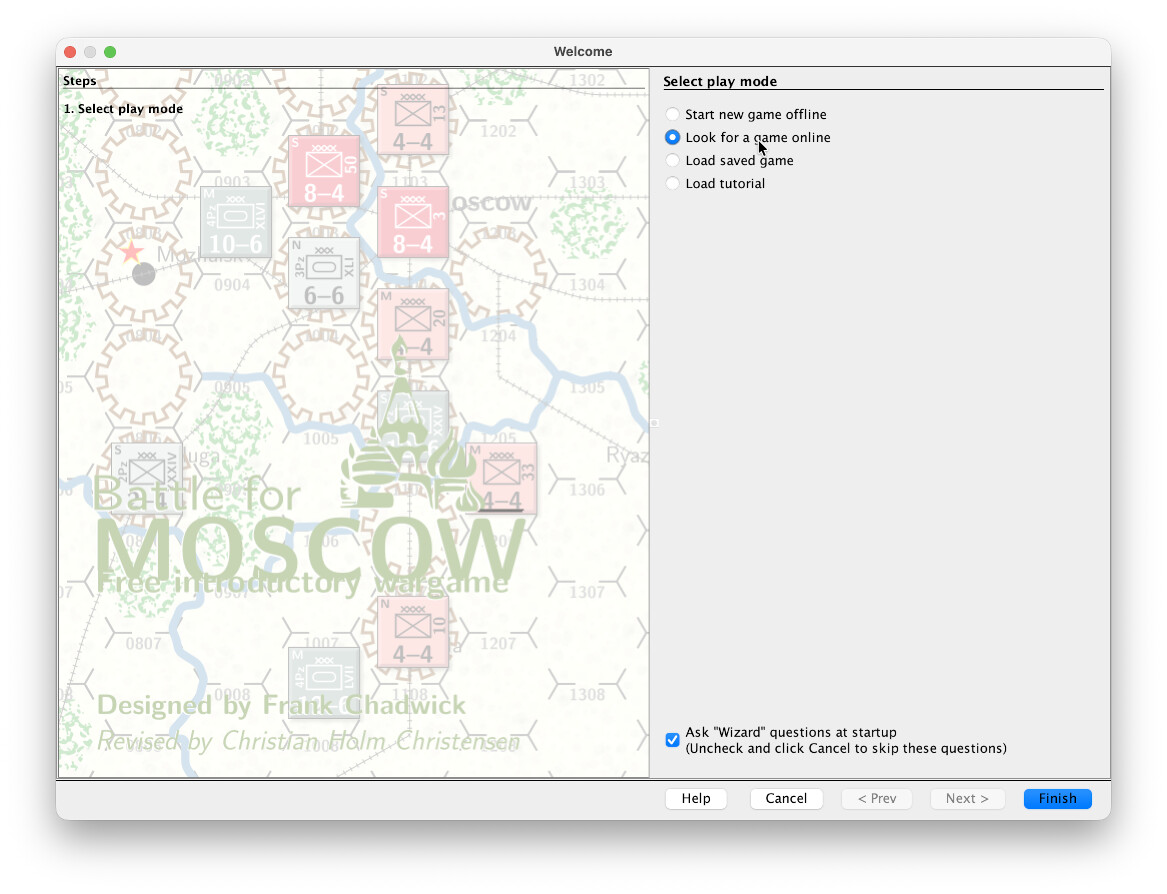
We start the Vassal and load the selected module. When prompted to choose the play mode, we select Look for a game online
-
We then click Finish
-
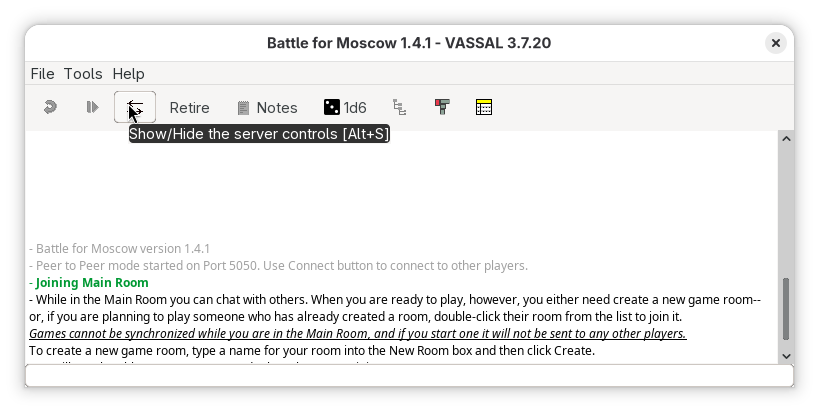
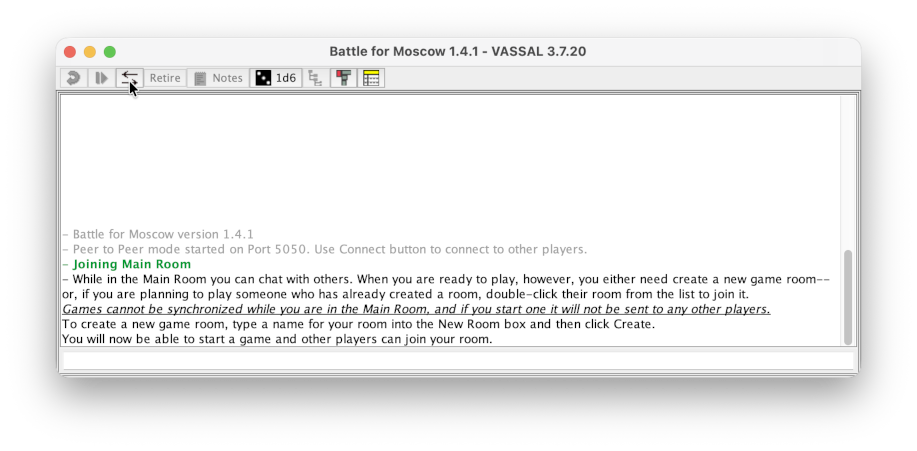
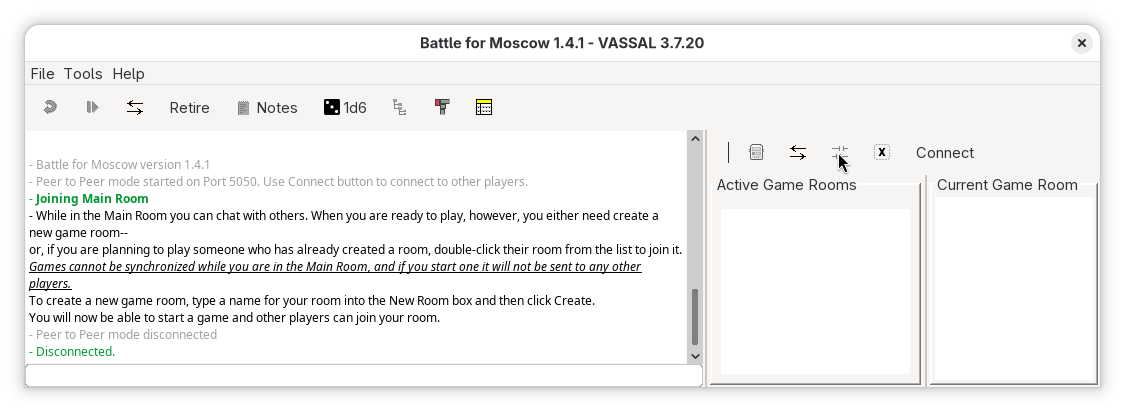
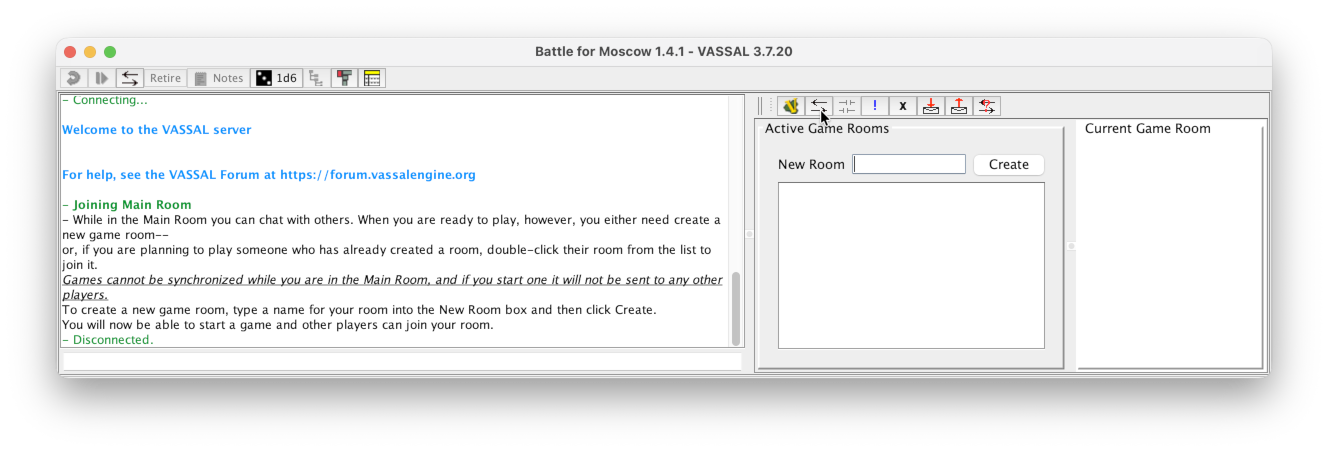
Now the module has been started up, but we have not yet started a game. First, we need to connect the clients to the central server.
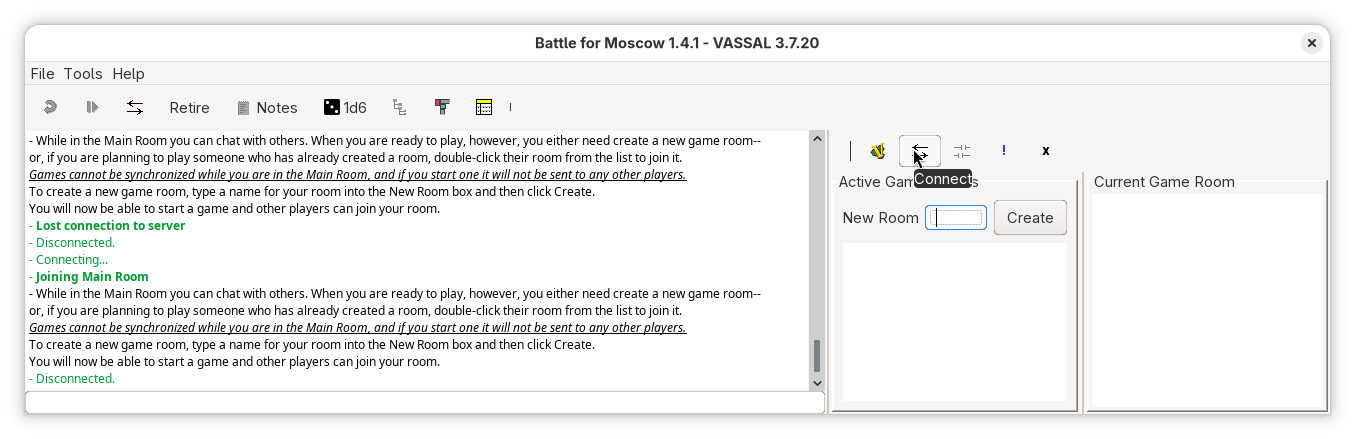
Press the Show/Hide server controls (Alt-S)
 button in the toolbar.
 -
If already connected to a server, press the Disconnect button

-
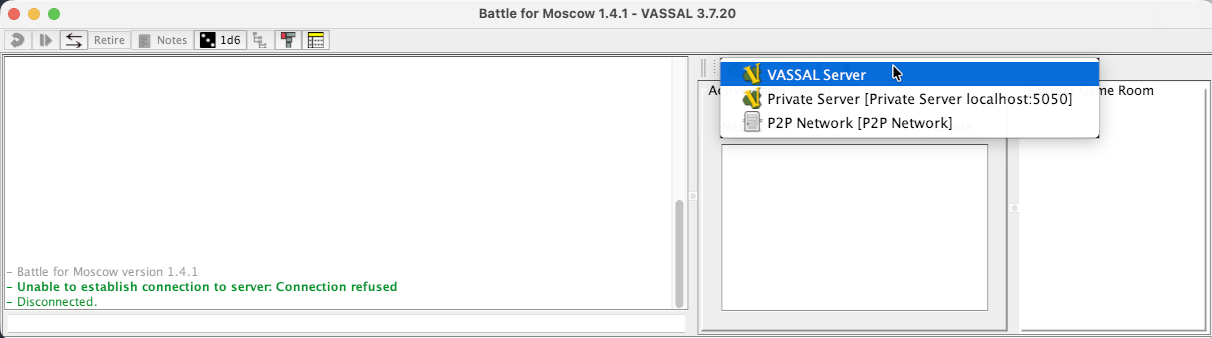
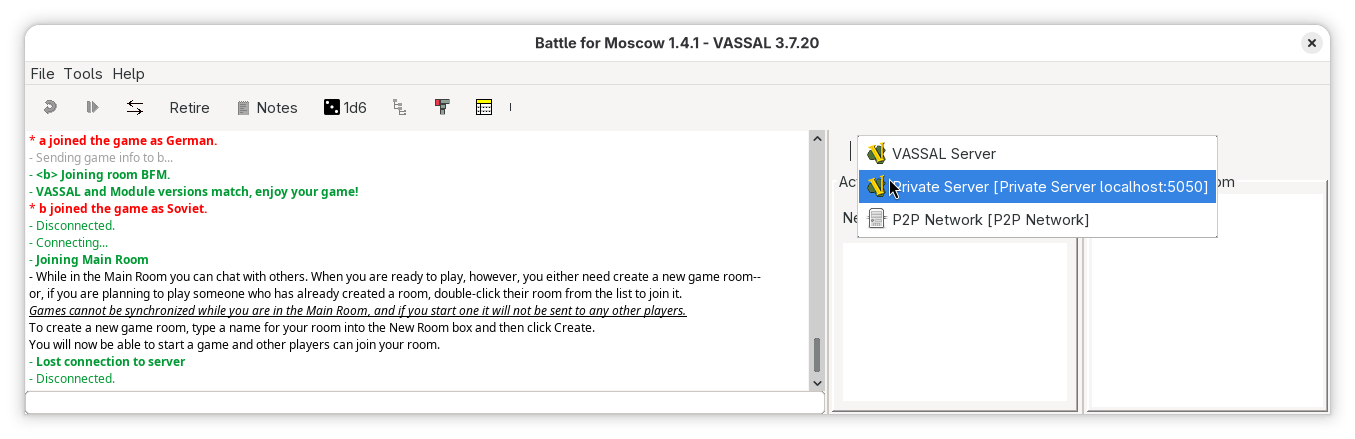
Now right click the server button and select VASSAL Server
-
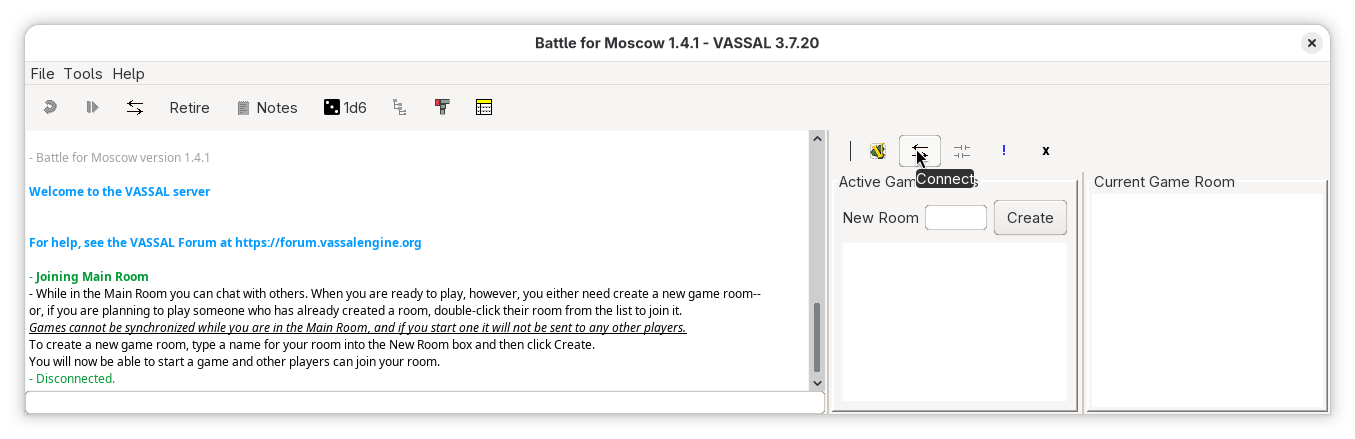
Now click the Connect button

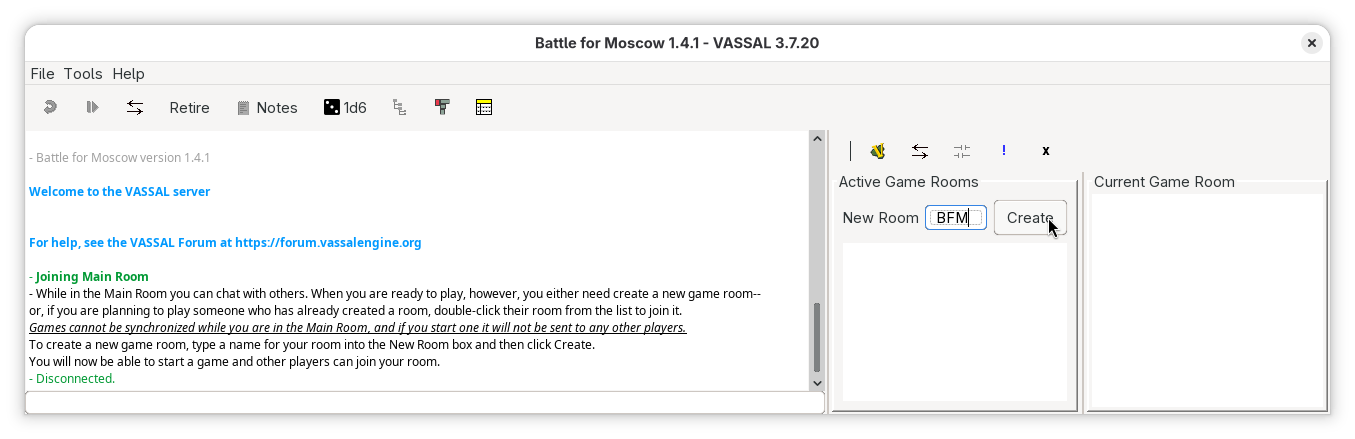
Only on client A
-
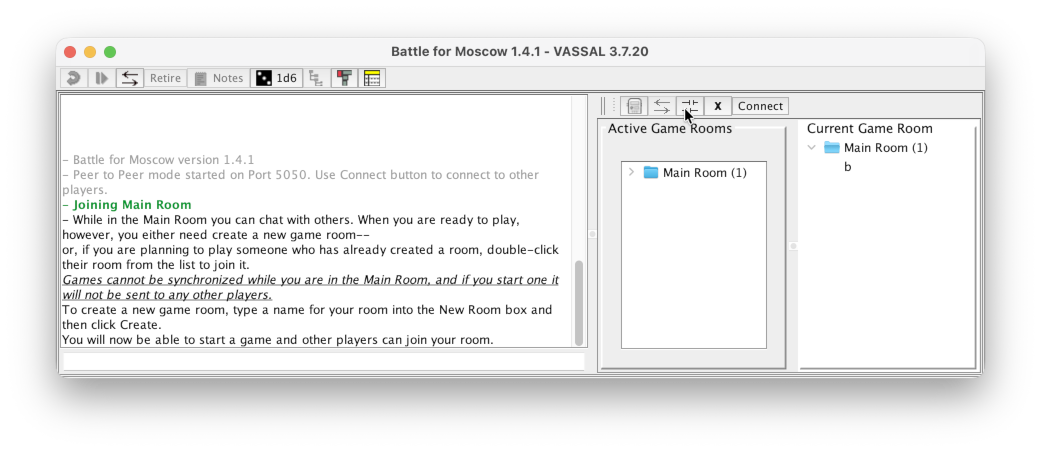
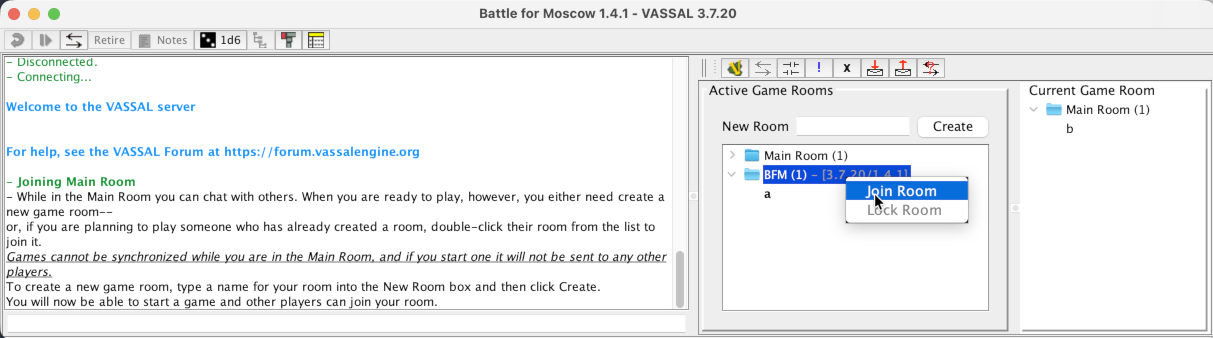
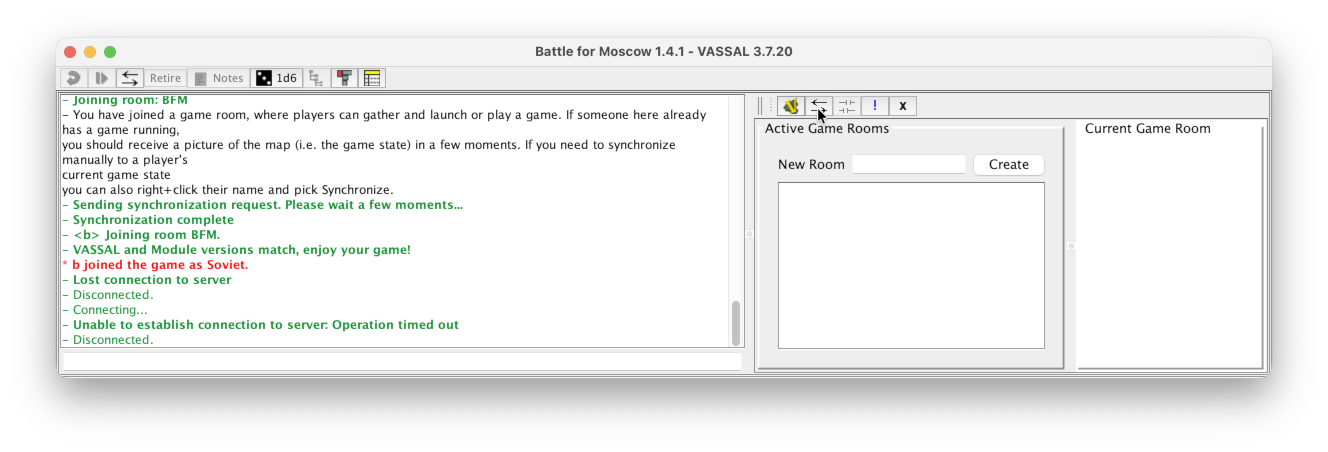
Create a new room, with a meaning full name - say
BFM, on the server and press Create. -
You know have a room, which other clients will join in, and where you will play the game.
-
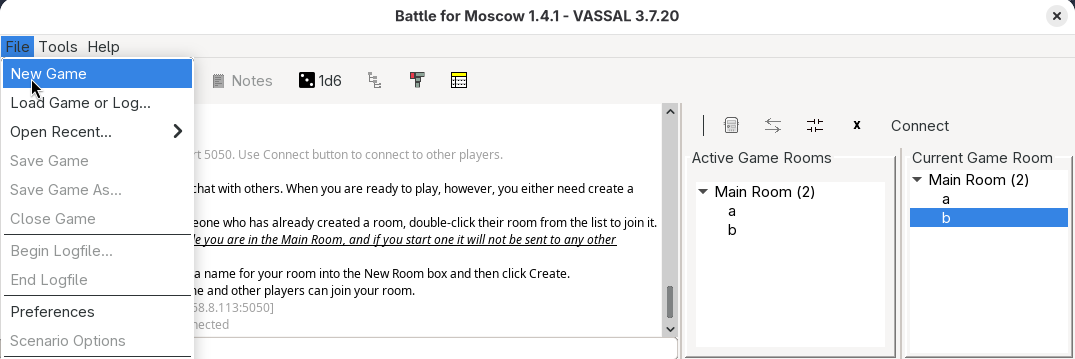
Still on the A client, start the game through the File→New Game menu entry.
-
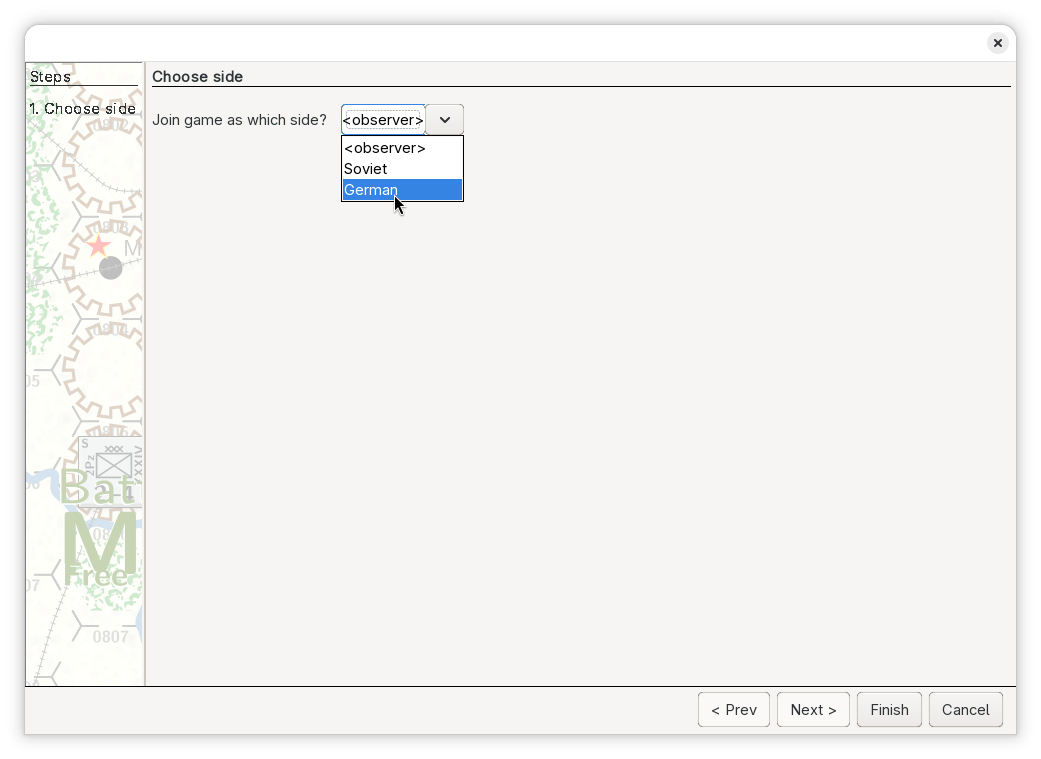
Client A will be prompted to select a side
Press Finish after selecting the side.
-
This will start up the game as per normal.
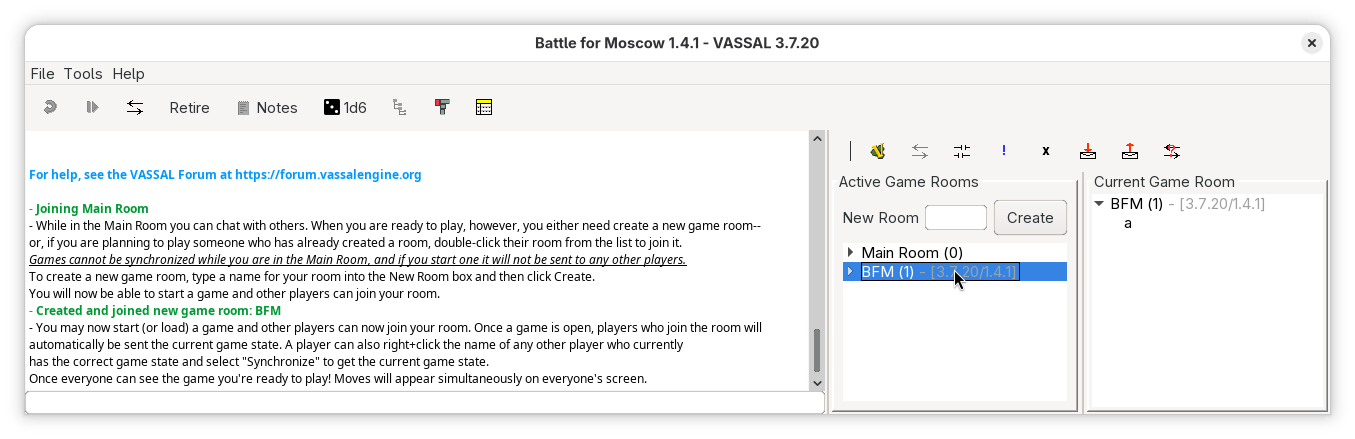
Only on client B
-
In the server controls window, right click the room created by client A above - here
BFM- and select Join Room -
Client B will be prompted to select a side

Both clients are now connected

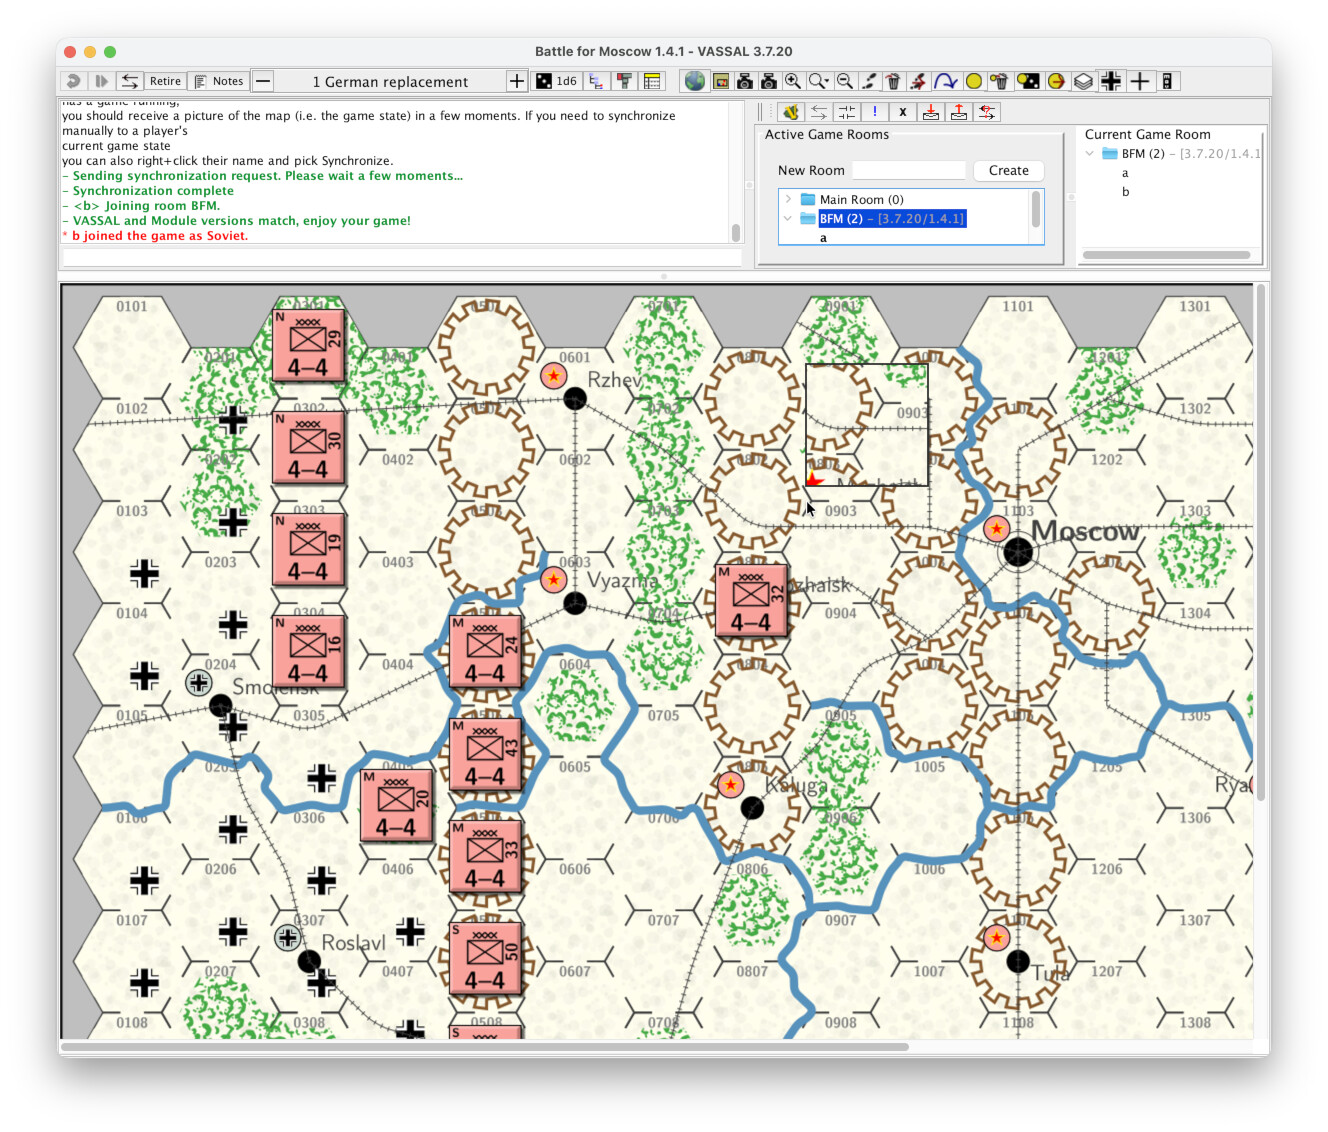
You and your follow player can now start to play the game.
Note, if the module uses a Turn Tracker, as the module Battle for Moscow does, then make sure to use that interface to keep track of the game progress. The module may limit certain actions to certain places in the game, as well as to certain factions. You should consult the module documentation, typically available in the Help menu.
Setup for private server
As above, we assume two clients A and B, which wish to play the module Battle for Moscow
Furthermore, we will assume that both clients are on the same Local Area Network (LAN).
| Machine | A | B |
|---|---|---|
| LAN IP | 192.168.1.2 |
192.168.1.3 |
| User | a |
b |
| Password | a |
b |
Note, both clients could be on the same machine. Also, if client A has a public facing IP address, then the clients need not be on the same LAN.
Security considerations
The Vassal server should be considered a security vulnerability. The server listens on an unprivileged port (5050), which means it cannot access too many resources on the host. Also, if the server runs as a regular user (as opposed to a privileged user - e.g., root), it can likely not access privileged information and only mess up the user it is running as.
However, access to the server is not authorised or authenticated in any way, meaning anyone with access to the host and port can access the server (this is by design to allow anyone to access the central Vassal server).
In short,
- Do not run the server as a privileged user - e.g.,
root - Stop the server when you no longer need it
- Consider to make a special user for running the service - say
vassald- and use one of the advanced ways (systemdorlaunchd) to run the server.
Only on client A
-
We need to start our private server. Exactly how this is done depends on the host system.
-
 Linux:
-
Open a terminal and navigate to where you have Vassal installed - say
/usr/share/vassal$ cd /usr/share/vassal -
Start the server
java -cp lib/Vengine.jar VASSAL.chat.node.Server -URL null
For a more automated way of setting up a server using systemd, see below.
-
-
 MacOSX:
-
Open a Terminal via Finder→Applications→Utilities→Terminal, and navigate to where you have Vassal installed - say
/Applications/VASSAL.app$ cd /Applications/VASSAL.app/Contents -
Start the server
$ MacOS/jre/bin/java -cp Resources/Java/Vengine.jar VASSAL.chat.node.Server -URL null
For a more automated way of setting up a server using launchd, see below.
-
-
 Windows:
-
Open a command prompt. To do that, press
-Rand typecmdin the pop-up dialog. You will be greeted by a black window with light-gray text and a command prompt
C:\Users\foo>where foo is your user name.
-
Change directory to where you install Vassal - say
C:\Program Files\VASSALC:\Users\foo> cd C:\Program Files\VASSAL -
Run the server
C:\Program Files\VASSAL> start jre\bin\javaw '-cp lib\Vengine.jar VASSAL.chat.node.Server -URL null'
-
Our private server should now be up and running on client A with IP address
192.168.1.2listening on port5050. -
On both clients
-
Follow steps 1 through 4 above for the central Vassal server.
-
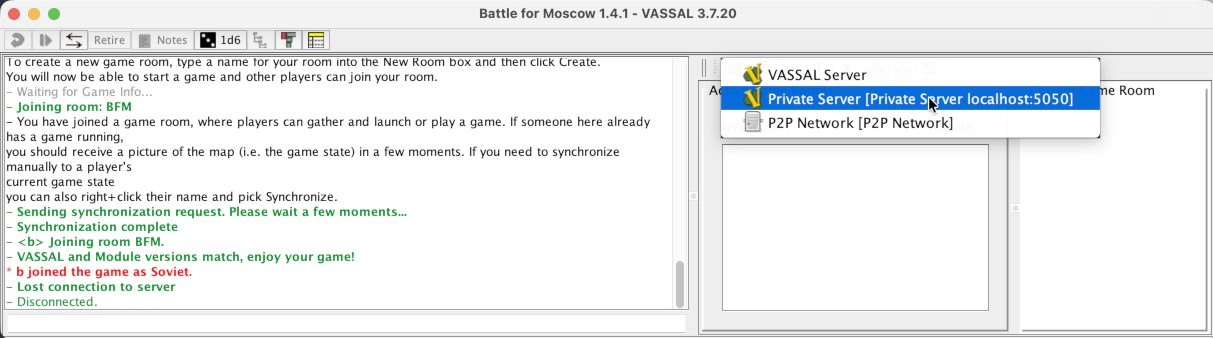
Now right click the server button and select Private Server
-
Click the server button and a new pop-up dialog will appear
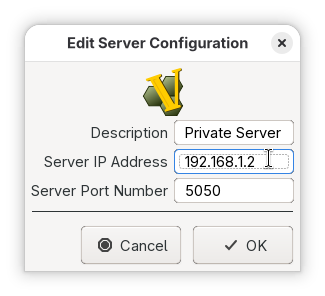
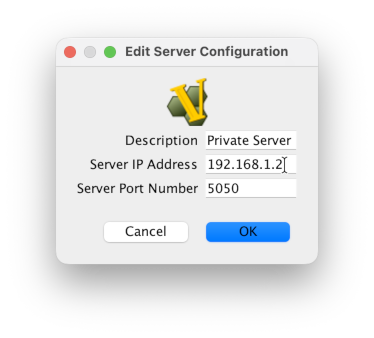
In this pop-up are 3 input fields
- Description: A free-form string
- Server IP Address: The IP address where the server is running. Above we started the server on client A with IP address
192.168.1.2, so we need to put192.168.1.2here. - Server Port Number: The port number on which the server is listening. Above, we used the default which is
5050, so we need to have5050here.
Press OK once the settings have been set.
-
Now click the Connect button
-
Now follow steps 7 through 13 above, as for the central server.
systemd setup
This is only available on ![]() Linux.
Linux.
We will set-up a systemd service (or unit) which makes setting starting and stopping the server much simpler. We will assume that Vassal is installed in /usr/share/vassal. If that is not your installation directory, adjust the paths accordingly.
- Create the directory
~/.config/systemd/userif it doesn’t exist already$ mkdir -p ~/.config/systemd/user - Create the service unit file
vassal.servicein that directory$ touch ~/.config/systemd/user/vassal.service - Edit
https://github.com/systemd/systemdto contain[Unit] Description=Vassal network game private server After=network.target [Service] ExecStart=java -cp /usr/share/vassal/lib/Vengine.jar VASSAL.chat.node.Server -URL null
Now we have defined our user service. We can now start, stop, and query the service.
- Start the server: To start the server, do
$ systemctl --user start vassal.service - Stop the server: To stop the server, do
$ systemctl --user stop vassal.service - Get status of server: To query the status of the server, do
$ systemctl --user status vassal.service
● vassal.service - Vassal network game private server
     Loaded: loaded (<home-directory>/.config/systemd/user/vassal.service; static)
     Active: active (running) since <date time>; 16min ago
 Invocation: 97b33fee412548deb2629815fdd5907f
   Main PID: <pid> (java)
      Tasks: 25 (limit: 37889)
     Memory: 47.3M (peak: 47.8M)
        CPU: 471ms
     CGroup: /user.slice/user-<uid>.slice/user@<uid>.service/app.slice/vassal.service
             └─<pid> java -cp /usr/share/vassal/lib/Vengine.jar VASSAL.chat.node.Server -URL null

<date time> <hostname> systemd[<pid>]: Started vassal.service - Vassal network game private server.
<date time> <hostname> java[<pid>]: Started server on port 5050
<date time> <hostname> java[<pid>]: Sent keep-alive
If you want the server to start up every time you log in, do
$ systemctl --user enable vassal.service
If you want the service to not start when you log in, do
$ systemctl --user disable vassal.service
Advanced setup - spawn on demand.
- Make the file `~/.config/systemd/user/vassal.service
Note the extra command line argument[Unit] Description=Vassal network game private server After=network.target StopWhenUnneeded=true [Service] ExecStart=java -cp /usr/share/vassal/lib/Vengine.jar VASSAL.chat.node.Server -URL null -port 5051-port 5051 - Make the file
~/.config/systemd/user/proxy-to-vassal.servicewith the content[Unit] Description=Proxy for private Vassal server Requires=vassal.service After=vassal.service [Service] ExecStartPre=sleep 1 ExecStart=/lib/systemd/systemd-socket-proxyd --exit-idle-time=90s localhost:5050 - Make the file
~/.config/systemd/user/proxy-to-vassal.socketwith the content[Socket] ListenStream=5051 [Install] WantedBy=sockets.target
The set-up above works as follows:
- A user connects to the host on port 5050
systemdis listening on that port viaproxy-to-vassal.socketsystemdwill start the serviceproxy-to-vassal.service(same stem name as the.socketfile) on the connection to the socket, but …- … since the service
proxy-to-vassal.servicedepends onvassal.serviceit will spawn that first. - The Vassal server is started up, but listening on port 5051 (notice the command line argument above)
systemdthen waits 1 second (theExecStartPre=sleep 1above)- Then,
systemdspawnssystemd-socket-proxydwhich will listen on port 5050 and forward all traffic tolocalhost:5051where the Vassal server is listening.
- … since the service
Because we have StopWhenUnneeded=true and --exit-idle-time=90s the Vassal server will be killed after 90 seconds of inactivity. Note that --exit-idle-time should be at larger than 1 minute, because that’s the frequency by which the Vassal clients will send a Keep Alive ping to the server.
To start this configuration, do
$ systemctl --user start proxy-to-vassal.socket
(note that we start the socket unit).
To shut down the configuration, do
$ systemctl --user stop proxy-to-vassal.socket
Remember, if you edit a unit, then you should do
$ systemctl --user daemon-reload
to read in the changes.
launchd set up
This is only available on ![]() MacOS.
MacOS.
We wil set up a system service that we can start at stop at will.
- Create the directory
~/Library/LaunchAgentsif it doesn’t exist already$ mkdir -p ~/Library/LaunchAgents - Create the plist configuration file
org.vassalengine.vassal.plistin that directory$ touch ~/Library/LaunchAgents/org.vassalengine.vassal.plist - Edit
~/Library/LaunchAgents/org.vassalengine.vassal.plistto contain<?xml version="1.0" encoding="UTF-8"?> <!DOCTYPE plist PUBLIC "-//Apple//DTD PLIST 1.0//EN" "http://www.apple.com/DTDs/PropertyList-1.0.dtd"> <plist version="1.0"> <dict> <key>Label</key> <string>org.vassalengine.vassal</string> <key>ProgramArguments</key> <array> <string>/Applications/VASSAL.app/Contents/MacOS/jre/bin/java</string> <string>-classpath</string> <string>/Applications/VASSAL.app/Contents/Resources/Java/Vengine.jar</string> <string>VASSAL.chat.node.Server</string> <string>-URL</string> <string>null</string> </array> </dict> </plist> - Load the service description
$ launchctl load ~/Library/LaunchAgents/org.vassalengine.vassal.plist
We have now set-up the service, and we may start and stop it at any time.
- Start the server: To start the server, do
$ launchctl start org.vassalengine.vassal - Stop the server: To stop the server, do
$ launchctl stop org.vassalengine.vassal - Query the server: To query the status of the server, do
$ launchctl list org.vassalengine.vassal
Spawn on request
In principle, it is possible for MacOS to spawn the server on request, just like for Linux above. One would add the lines
    <key>Sockets</key>
    <dict>
        <key>Listeners</key>
        <dict>
            <key>SockNodeName</key>
            <string>127.0.0.1</string>
            <key>SockServiceName</key>
            <string>5050</string>
            <key>SockProtocol</key>
            <string>TCP</string>
        </dict>
    </dict>
to the above .plist file. However, this assumes that the Vassal server can create a listening socket from an existing file descriptor - which it cannot. To get around that problem for Linux, we set up a proxy (systemd-socket-proxyd). However, it is not clear how such a proxy would be set-up on MacOS.