Vassal-python - tool for helping module developers automate repetitive changes

Hey everyone. In the past I’ve wanted to make changes in a module’s structure or add some features that make it more fun to play - like automating certain repetitive game features, or adding new Layer’s to every piece… Until now, I’ve had to do it manually in the editor or (dread the thought) open up the module and edit the buildFile by hand (gasp of horror).

This has stopped me from making changes to modules I enjoy playing and has stopped me from playing some modules I would want to play but they are too many changes needed to make the module fun to use (think Divine Right).

What I want is the power of a scripting language that give tools like regular expressions and functions to be able to automate a series of changes to a module - and then save it - and to have the safety of VASSAL’s own type system to stop me from making a hash of editing by hand.

(drum roll)

Enter vassal-python (module: vassal-python · PyPI, source: GitHub - jasonestewart/vassal-python: tools for manipulating vassal modules in python) into the fray! It is still early days but it already does some pretty nice stuff and more is coming.

For example, one of the included applications will print a formatted list of all the game pieces in the module:

$ python3 module-print.pl --mod test.vmod
VASSAL: initGameModule: start
... [SNIP: vassal-pyton startup messages]
VASSAL: initGameModule: end
USA
Union Army of West Virginia
    Commander
        Crook, AWV
    Thoburn's Division, 1/AWV
        Thoburn's Division, 1/AWV
            Thoburn 1/AWV
            1/AWV Brigades
                Wells, 1/1/AWV
                    Wells 1/1/AWV
                    Wells Rgmt 1
                    Wells Rgmt 2
                    Wells Rgmt 3
                    Wells Rgmt 4
                    Wells Rgmt 5
                Ely, 2/1/AWV
[SNIP: more output]
Success!

Also, there is an application that enables scraping of numbers off the images of game piece counters and a second that takes the output of the scraper and adds markers to every unit and uses that scraped data as the state of the marker. The image scraper will ask for confirmation if it doesn’t have sufficient confidence in the guess. It will pop up an image window showing what it scraped and what it’s best guess of the number is. Click on the image window and hit enter to make it go away and then back in the shell window, hit enter to use the default value or type in a new value and hit enter to continue.

$ python3 image-scrape.py --image-dir ./images --names-file names.txt --ss-file start-str.txt
Reading image: 14IN_front.png
Found strength: 9

Reading image: 14INa_front.png
Found strength: 5

Reading image: 14INb_front.png
Found strength: 4

Reading image: 8OH_front.png
Found strength: 14

Reading image: 8OHa_front.png
ss_10: 7, ss_8: NONE>> 7
...[SNIP: interactively prompts user for confirmation]
enter correct strength: >> 7: 
Found strength: 7
...[SNIP: more output]
Success!
$ python3 add-starting-strengths.py --mod file.vmod --ssfile starting-strengths.txt
VASSAL: initGameModule: start
...[SNIP: vassal-pyton startup messages]
VASSAL: initGameModule: end
Piece: 34MA_8_front.png
	Found SS for piece: 34MA_8_front.png, strength: 8
Piece: 5NY_HA_12_front.png
	Found SS for piece: 5NY_HA_12_front.png, strength: 12
Piece: 116OH_10_front.png
	Found SS for piece: 116OH_10_front.png, strength: 10
Piece: 123OH_10_front.png
	Found SS for piece: 123OH_10_front.png, strength: 10
Piece: 170OH_front.png
	Found SS for piece: 170OH_front.png, strength: 8
Piece: Ely_front.png
Piece: 1WV_2_1_AWV_front.png
	Found SS for piece: 1WV_2_1_AWV_front.png, strength: 8
Piece: 4WV_front.png
	Found SS for piece: 4WV_front.png, strength: 8
Piece: 12WV_2_1_AWV_front.png
	Found SS for piece: 12WV_2_1_AWV_front.png, strength: 8
Piece: 18CT_2_1_AWV_front.png
	Found SS for piece: 18CT_2_1_AWV_front.png, strength: 8
Piece: 2MD_ES_front.png
	Found SS for piece: 2MD_ES_front.png, strength: 8
Piece: Young's_PB_front.png
	Found SS for piece: Young's_PB_front.png, strength: 8
...[SNIP: more output]
Success!

Let me know here, or on github what works, what doesn’t and what features are needed. Enjoy your module mangling!

#Include(“standard-disclaimer”)
This is alpha code. Make a copy of your module before you feed it into the applications based on this package. Check your changes in the editor after you’ve made them. You’ve been warned.

#end
Installing vassal-python

Using the normal python tools for install python packages isn’t working well for the project (I’m a python novice - advice accepted).

So for now, until I get the package installation working properly with all the files, the best way to install is to grab the files on github using clone or zipfile download:

The github way: git clone

$ git clone https://github.com/jasonestewart/vassal-python.git
... [SNIP: file install list]

Download the zip file

  1. Open your web browser
  2. Go to GitHub - jasonestewart/vassal-python: tools for manipulating vassal modules in python
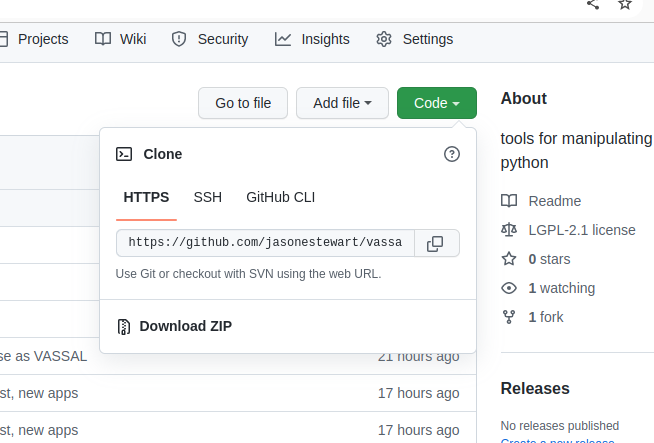
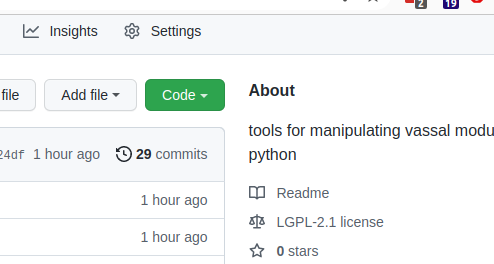
  3. Click on the green “Code” button
    github-code-button
  4. Choose download ZIP
    github-code-zipfile
  5. Unpack the zip

Setting up the environment & installing required packages

No matter which way you’ve done it, you’ll have a directory, vassal-python, with all the code. We’ll cd into that directory, and install all the required python packages needed for vassal python to work. But before we do that, we’ll want to create a new virtual python environment so that you don’t pollute your global environment, and activate it:

$ cd vassal-python
$ python3 -m venv py-vassal-venv
$ source py-vassal-venv/bin/activate
(py-vassal-venv) $ 

When you activated the virtual environment it updates your prompt to let you know by prepending the name of the environment you created: (vassal-python). Make sure you’ve got that prompt while working on your vassal-python project. See below for how to deactivate the environment once you’re finished.

Now install all the required python packages:

(py-vassal-venv) $ pip install -r requirements.txt
... [SNIP: required modules install]

Once all the required python packages have been downloaded, there are two crucial environment variables we must set up for the sample applications to run:

  • CLASSPATH: This is used by Java to locate the necessar Java class files. Most of these files are included with your VASSAL installation and there is one extra included with vassal-python.
  • PYTHONPATH: This is used by python to locate python modules that are not yet installed
(py-vassal-venv) $ export PYTHONPATH="$PWD/src/python"

That one was easy. $PWD is the present working directory - the directory we’re currently in.

Next we need to configure CLASSPATH. This requires a bit more work. First find the directory your VASSAL is located in (mine lives in ~/VASSAL-3.6.4/). You’ll know you have the correct directory because inside of it there will be another directory called lib/ and in that directory will be many .jar files. You’ll know it’s the correct one because the main VASSAL jar, Vengine.jar will be there. Here’s what mine looks like:

(py-vassal-venv) $ ls ~/VASSAL-3.6.4/lib/Vengine.jar
/home/jasons/VASSAL-3.6.4/lib/Vengine.jar

Now we’re all set to configure CLASSPATH to include the lib/java directory (that contains Helper.class) and everything in the vassal/lib directory, that contains all the .jar files:

(py-vassal-venv) $ export CLASSPATH="$PWD/lib/java:/home/jasons/VASSAL-3.6.4/lib/*"

I went ahead and used the absolute path to the VASSAL lib directory and $PWD for the lib/java directory that Helper.class is in.

Aside: For the sharp-eyed among us - it actually is lib/java/VASSAL/tools/python/Helper.class because the full name of the class is VASSAL.tools.python.Helper and java wants the directory structure to reflect that. Just like python does for it’s modules. But by specifying CLASSPATH as lib/java, java will look for the package VASSAL starting in lib/java. Nice, huh?

Once that’s done, we’re good to run a test! Grab your favorite module, and make a copy (always make a copy - it’s good to have backups) and call it test.vmod, and then run the module-print.py application to print all the counter information:

(vassal-python) $ python3 src/python/apps/module-print.py --mod test.vmod
VASSAL: initGameModule: start
VASSAL: doInit: start
VASSAL: init: start
VASSAL: init: end
VASSAL: doInit: init finished
VASSAL: doInit: using moduleFilename: /home/jasons/Downloads/2nd_Kernstown_1.25.vmod
VASSAL: doInit: creating GameModule
VASSAL: doInit: finished creating GameModule
VASSAL: doInit: GameModule.init finished
VASSAL: doInit: end
VASSAL: initGameModule: end
Markers
Markers
    Game Markers
        Abandoned Guns
        Breastworks/Construction
        Charge Inf/Cav
        Collapsed
... [SNIP: more output]
Success! 

You’ve now got a working vassal-python installation!

NOTE: There is a deadlock condition that happens when exit(0) is called. When this happens, the program hangs after execution is finished. In order to prevent this, programs must call Manager.shutdown() before they exit.

When you’re done using vassal-python exit your virtual environment safely:

(vassal-python) $ deactivate
$

Your prompt reverts back to the original state without the prefix (vassal-python)

1 Like

Hi Jason,

Nice.

I have another tool to manipulate a VASSAL module. It takes a different approach to yours, in that it deals with the ZIP file and the DOM of buildFile.xml and moduledata directly.

You can find it at

Basically, its use is something like

  • Open the module using zipfile.ZipFile
  • Get the buildFile.xml entry in the module
    • Parse in the DOM via xml.dom.minidom
    • Manipulate the DOM
  • Write new buildFile.xml
  • Update the module ZIP file

The tools have functions to

  • Get specific elements in the DOM, e.g, a map, board, pieceslot, and so on
  • Add specific elements to the DOM, e.g., a map, a grid, a board, a pieceslot, and so on
  • Encode and decode (some) piece traits. This is not complete, but can be extended as needed.

Most of the things going on are using plain Python. If one need some sort of image manipulation, or the like, then one can use for example PIL.

The tool was developed to help facilitate exporting a VASSAL module from LaTeX sources, and as such isn’t a true standalone Python module. However, if one does something like

import wgexport as wg 
from zipfile import ZipFile 

with ZipFile('module.vmod','r') as vmod:
     build = wg.get_doc(vmod.read('buildFile.xml'))

# Use wg functions, e.g., 
pieces = wg.get_pieces(build,asdict=True)
mypiece = pieces['mypiece']
parts       = wg.get_piece_parts(mypiece.childNode[0].nodeValue)
# Parts is a list of piece traits which can be changed, amended to, and so on 
... # More stuff using wg and xml.dom functions etc. 

with ZipFile('module.vmod','r') as vmod:
      with ZipFile('temp.vmod','w') as newvmod:
            newvmod.comment = vmod.comment # preserve the comment
            for item in vmod.infolist():
                if item.filename != 'buildFile.xml':
                    newvmod.writestr(item, vmod.read(item.filename))
            newvmod.writestr('buildFile.xml', build.toprettyxml(indent=' ',
                                                                                            encoding="UTF-8",
                                                                                            standalone=False))

one will get a new module file temp.vmod with the buildFile.xml updated according to that specified in the script.

Note, it is possible to build an entire module from scratch (well, external images need to be there already) using the tool (which is how I use it to export from PDF and JSON created from LaTeX).

Anyways, I though you might find it interesting.

Yours,

Christian

1 Like

Hej Christian! A very impressive looking tool. Had I known of your tool years ago when I started, I probably might never have ventured the road I took!

The idea of generating the wargames directly from TeX sources seems fascinating but I haven’t had much time to take a look.

There are a few significant pieces that I need to directly manipulate the buildFile.xml in order to accomplish - but that is mainly deleting all the old prototypes and replacing them with the new prototype definitions - so it’s a cut&paste of a single block of text.

Thanks for letting me know of you work! Cheers, jas…

Hi Jas,

Thanks for the kind words. I recently updated the script to be more Object Oriented (as far as Python allows), and it should be simpler to use. In almost-code

from wgexport import *

with VMod('MyModule.vmod') as vmod:
    build = vmod.getBuildFile()
    game = vmod.getGame()
    maps = game.getMaps()
    main   = maps['main']
    # Do more with main, e.g., add boards,
    # change parameters, etc. 

     # Get specific game pieces    
    pieces = game.getSpecificPieces('foo','bar','baz',asdict=True)
    foo = pieces['foo']
    bar = pieces['bar']
    # Get the traits of a piece
    foo_traits = foo.getTraits()
    # Note, not all trait types are recognised
    for trait in foo_traits:
        print(trait.ID,
              trait._tnames,
              trait._types,
              trait._snames,
              trait._status)

    # To update the module after manipulating here
    vmod.removeFiles(VMod.BUILD_FILE)
    vmod.addFile(VMod.BUILD_FILE,build.encode())

Note that not all traits are recognised by the code. however, it shouldn’t be too difficult to make the code for a missing trait (if you do, please send it to me and I’ll include it). One basically need a simple Python class deriving from wgexport.Trait with a keyword arguments constructor.

The DOM elements of buildFile.xml are wrapped in classes to make it easier to manipulate. These are simple stateless wrappers that are created on the fly.

Yours,

Christian