Introduction
Welcome to the 3rd and final installment in this series of mini-tutorials! The first one is here and the second here.
In this mini-tutorial we will look at how the state of various on-map units can be mirrored on a Leader Board.
Background
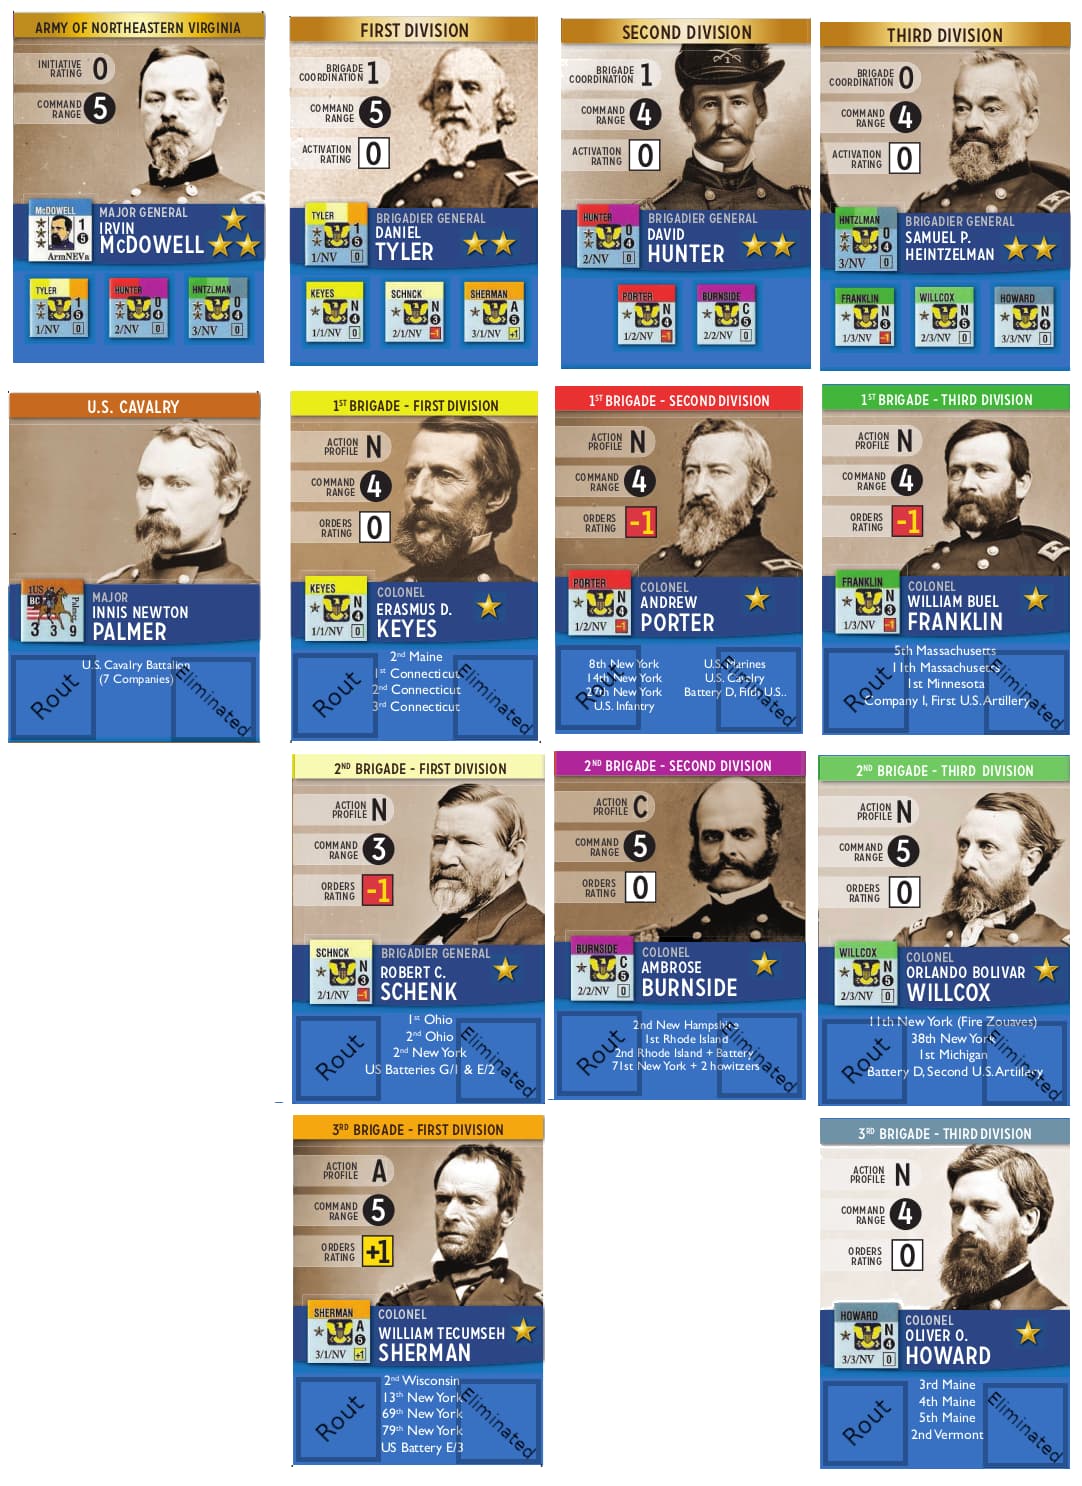
In this example we will again be using the Red Badge of Courage module. The changes I’m describing were just released in the “-j21” version of the module. RBoC is part of the Great Battles of the American Civil War series and it is a regimental level recreation of two battles: 1st and 2nd Manassas. I’ll be using units from the 1st Manassas battle for my examples. In the battle there are 3 armies: 2 for the Confederate States of America: The Army of the Potomac, led by PTE Beauregard, and The Army of the Shenandoah, led by J. Johnston; and one army for the Union: The Army of Northeastern Virginia led by I. McDowell. All totalled, there are 12 on-map leaders for the Union (1 Army commander, 3 division leaders, and 8 brigade leaders) and 11 for the CSA (2 Army commanders and 9 brigade leaders). During the heat of battle, it can often be a challenge to track what the currents status is for each command. All leaders must track if they have been replaced due to injury during battle, Union division leaders and CSA Army commanders must track Divisional Combat Effectiveness, and all brigade leaders must track Fatigue, Brigade Combat Effectiveness, Activations, and eliminated and routed units. Phew! The original paper and cardboard version of the game gives each side no help to track these off-map and instead relies on extra counters to be stacked together with each leader to track the logistical details (anyone say Tower of Babel?). To get around this issue, I created a way to display the information using layers directly on the on-map leader counters.
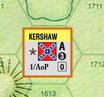
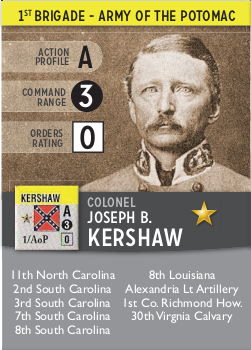
For example, here is a CSA brigade leader: Kershaw at the start of the battle with no extra information:
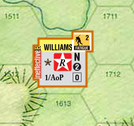
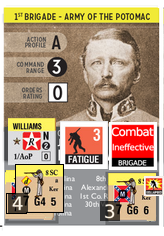
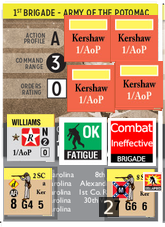
and during the battle with a fatigue level of 2, he’s been wounded and replaced by a subordinate, and his brigade has lost combat effectiveness:
This worked, to a point. It had several challenges: brigades gathered fatigue if they activated more than twice during any hour (so I needed to track how many activations each command had completed) and I needed to be able to locate the leader counter to find the information - sometimes the leader was buried under a group of other units and hard to find, sometimes (after a leader had just been wounded) his counter off-map waiting in the replacement track. And in order to know if a command had lost combat effectiveness you have to track the number of routed and eliminated units in the command. Hmm…
After a while I decided that I would have a leader board for each side and the information could be tracked there. Luckily for me, some kind soul on BoardGameGeek made individual leader cards for each of the leaders in the battle, and I used those graphics for the Leader Boards.
After a SMOG (small matter of gimping), here is the Union:
and the CSA:
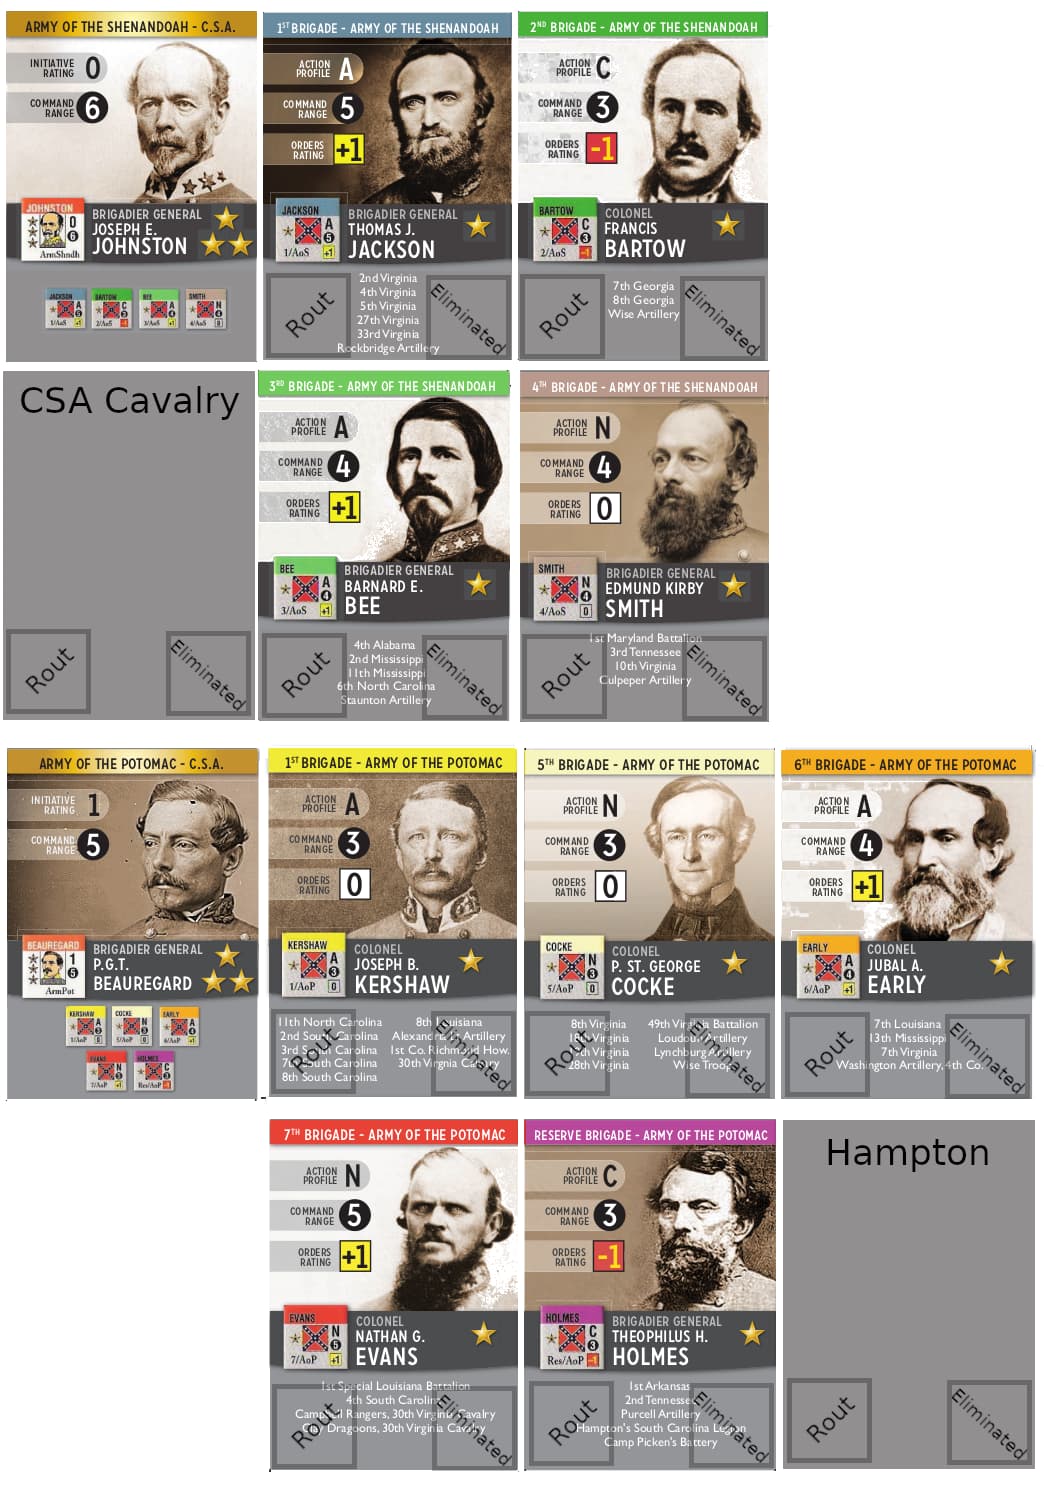
(you can tell this was a time of great experimentation with male facial hair)
Here is an example of how our early example of Kershaw would look on his leader card:
In the beginning I figured I would simply add the logistical counters to each leader’s section and track it manually. This lasted about 15 minutes and I decided this needed to be automated - this is VASSAL, after all! This tutorial is about the steps needed to complete the automation.
First Steps
Layer Follows Expression
Originally, the leader game pieces used a group of Layer traits that were set to “Loop through levels” and given “Increase level” and “Decrease level” commands as seen here for the fatigue layer:
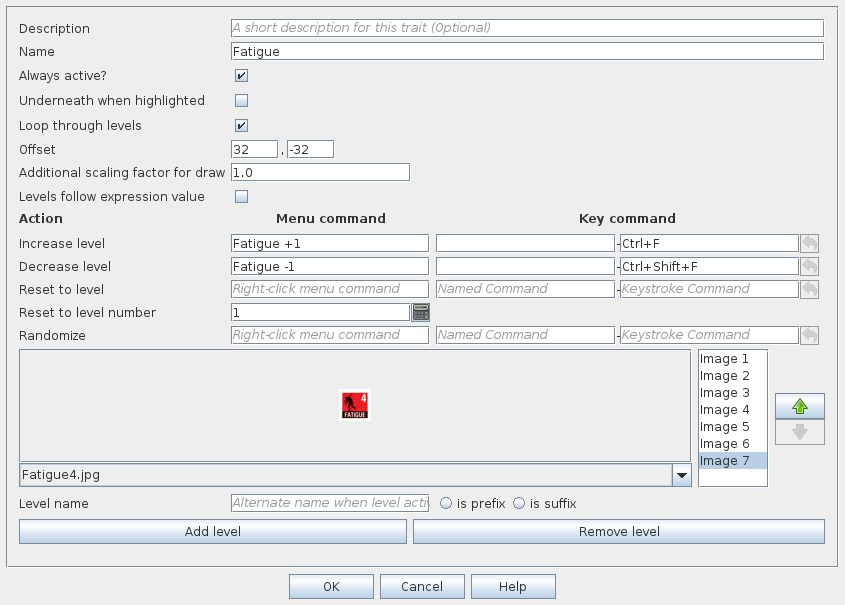
This was fine when all I had to track was the single on-map counter but if I now wanted to mirror that information on a different map board I was going to need a different strategy: enter “Levels follow expression value”! This setting enables you to provide a BeanShell expression whose resulting value will set which level to display. Here is the new fatigue layer:
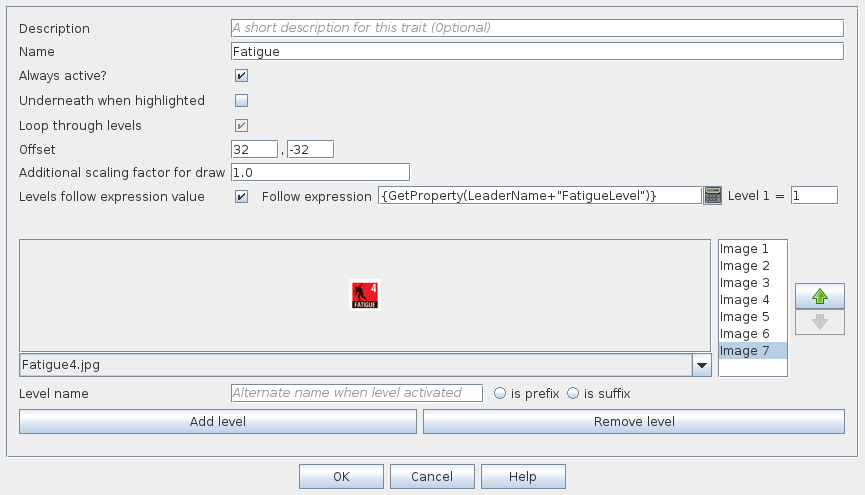
This leads us to the next needed piece: configuring global properties.
Setting up our Global Properties
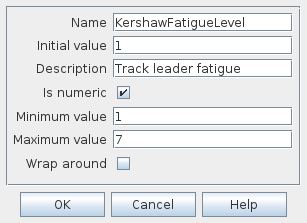
The expression I track for the fatigue layer is a simple fetching of the value of a global property that is set to the fatigue layer for that leader. In order to know which property to use, I construct the property name by concatenating the name of the leader with the string constant “FatigueLevel” - so for “Fighting Joe” Kershaw that ends up being: ‘KershawFatigueLevel’. So in order to track each of the attributes for each of the leaders it requires creating a large number of global properties. Before the 3.6.0 series I would not have attempted this because before then all global properties lived under one folder, the Global Properties folder. With 3.6.0 the gift of creating sub-folders within folders was gifted to us and so all of the properties could be nicely organized and kept tidy and easy to find. Here is a glimpse of the organization needed:
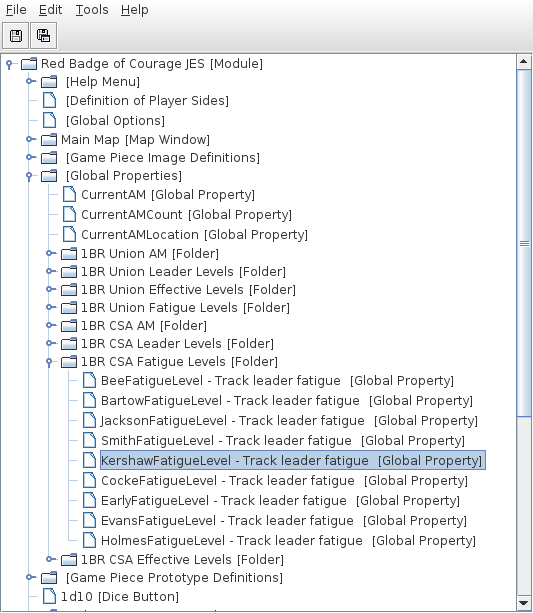
and the settings for the property in question:
“But…” you may ask (because you are clever), "how does the value of KershawFatigueLevel get changed? Excellent question! What we need is a way for a game piece to alter the value of a Global Property. This leads us to the next piece of the puzzle: the Set Global Property traits for game pieces.
Set Global Property traits
What Dynamic Property traits provide you for modifying game piece properties, the Set Global Property trait does for Global Properties. Here is the one for FatigueLevel:
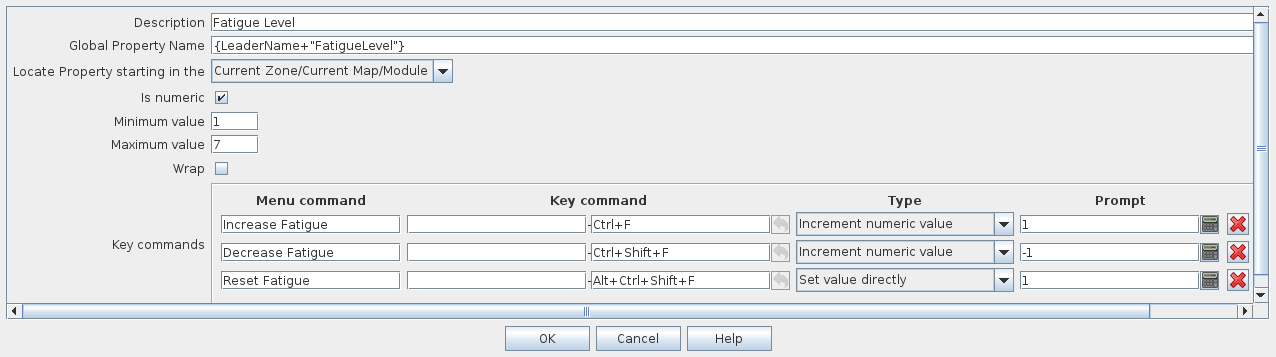
The Description field is just for us to organize things. The Global Property Name specifies which property to modify. This could be a string constant: “KershawFatigueLevel”. Originally, this was what I began doing. That meant I needed to create a different SGP trait for each leader because the property name was hard-coded. I quickly wanted to come up with a different strategy. So I created a Marker trait for each leader, “LeaderName”, which is set to a string constant of each leader’s name, “Kershaw” in this example. This worked fine for the SGP trait using the BeanShell expression you see here: {LeaderName + “FatigueLevel”} which is just a string concatenation of the value of the Marker, LeaderName, with the string constant “FatigueLevel”. But the challenge came in the actual Layer trait when I didn’t just want the name of the property but the current value of that property. I just couldn’t figure it out reading the (very helpful) documentation (thank you @Cattlesquat). I was ready to give up but after a few pleading messages on the VASSAL discord channel for module discussion, the ever knowledgable and friendly Joel @uckelman game to my rescue: “Use GetProperty()”.
Remember GetProperty? Of course you do because you’re sharp-eyed - you saw it in the corrected Layer dialog for the Fatigue Layer trait above. GetProperty(“some-prop”) inside a BeanShell expression looks up the current value of the property, some-prop, and places it in the expression. I knew that. But it took Joel to remind me. After I got done beating my head against the wall for fun I got on with things.
The SGP provides the same boundary conditions that we saw in the Global Property for KershawFatigueLevel: the value is numeric, has a minimum of 1, and a maximum of 7. We provide three different commands for manipulating a units fatigue: increase, decrease, and reset. For the first two commands, the Type parameter is set to “Increment” and increase increments by +1, and decrease by -1. For the reset command the Type is “set value directly” and the value is 1 (the value of 1 corresponds to the first level of the layer [[check back to the Layer image above where it says “Level 1 = ‘1’”]] - which is a blank image so the normal game piece image is used). Each of these commands have the “Menu Command” field set, so each will appear in the pop-up menu for the game piece. Each also provides a keyboard shortcut.
Here is Kershaw’s pop-up command menu:

Mirroring the consequences
Marking the Leader Board
Now that we have the needed changes to the on-map units, let’s look at how we enable the Leader Boards to give feedback all in one place.
Here is what the raw image for a brigade leader looks like that I’ve adopted for use:
What I needed to do first was assign regions of card space for the different feedbacks required:
- Replacement status
- Fatigue level
- Combat Effectiveness
- Activations
- Routed units
- Eliminated units
Here’s his leader card with the areas of feedback defined:
What’s needed is to add Zones and Regions to each Leader’s Card and use these as destinations for units and markers (needed for tracking the activations and the routed and eliminated units) and to add At-Start Stacks that will hold our special information mirroring units (needed for tracking replacement, fatigue, and combat effectiveness).
Here is the zones and regions defined for Kershaw:
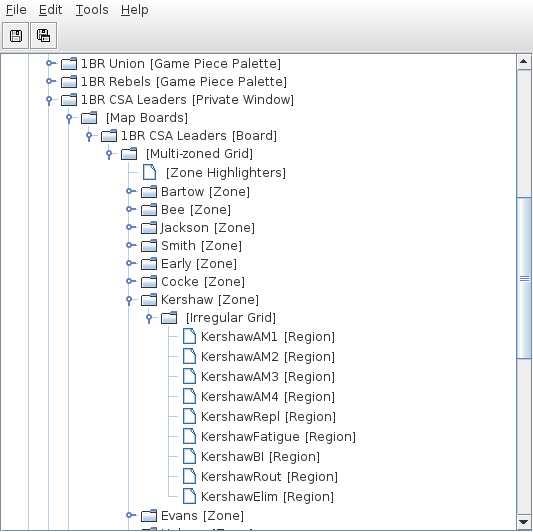
The KershawAM1 through KershawAM4 are the regions we will use as destinations for the activation markers to track how many times Kershaw has been activated during a turn (brigades can have between 0 and 4 activations and any activations above 2 incur fatigue). A brigade is activated when their brigades Activation Marker (AM) is draw from the AM Draw Pool. After the brigade is finished all it’s actions for the activation we want a way to send it to to the next empty slot in the activation track for that leader on the Leader Board. So there are two steps: 1) figuring out which slot is the next one, and 2) a way to send the marker to a location.
First, to track the next AM slot, we use a global variable KershawAM_Count, as seen here:
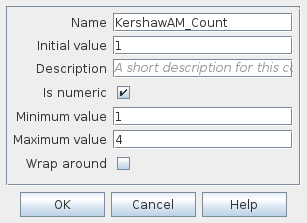
It is a number from 1 to 4. Every brigade leader in the game has one defined. After Kerhsaw’s activation is finished we want to activate a command in the pop-up menu for the AM marker that will send it to the correct slot in Kershaw’s AM track. Here is the pop-up:

“Return to Used AMs” is the command we will use. Let’s see what it does. We’re using a Trigger Action trait that is in a shared prototype for both CSA and Union AMs:
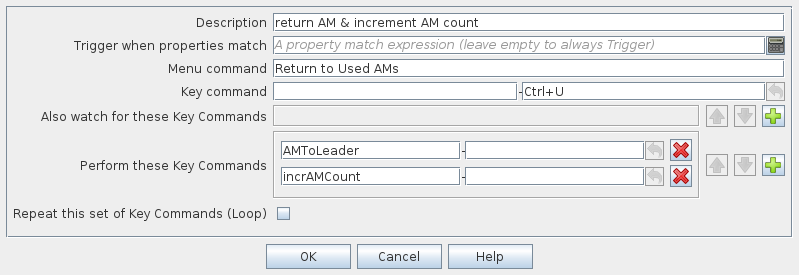
You can see the Menu Command that adds this to the pop-up menu and the keyboard shortcut for the command. Then, this trigger has two actions: AMToLeader - which sends the marker to the next slot on the correct leader board and incrAMCount, which sets the next available AM slot for this leader. This trait is defined in a prototype that is common to all AM markers. Because the CSA player and the Union player have separate Leader Boards the Send To Location trait that defines the AMToLeader is in a prototype that is specific to the CSA player:
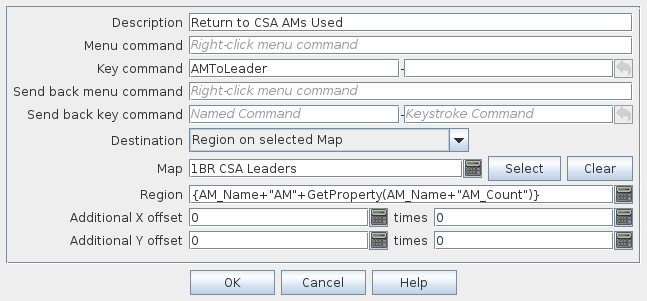
Notice, no Menu Command so it is only triggered by the Trigger Action and does not show up in the pop-up menu. We defined which map to use and we calculate what region to send it to. The region is a concatenation of three pieces the value of AM_Name (which is a Marker trait, or constant, defined for each of the brigade leader’s AMs - “Kershaw” in our example), the string constant “AM” and the value that is returned by the GetProperty call (which fetches the current value that is stored in the global property that tracks the next available AM slot for the leader. The concatenation of AM_Name (“Kershaw”) with the string constant “AM_Count” yields “KershawAM_Count” - the Global Property we defined earlier. So if this was Kershaw’s 1st activation for the turn, KershawAM_Count would be 1, so the region would end up being: “KershawAM1” - as we saw in the regions earlier.
Then, the second part of the Trigger Action, incrAMCount, is called to update which slot is next available. This Set Global Property trait is defined in the prototype that is common to all AMs since it has no player-specific information:

The Global Property Name is a BeanShell expression that evaluates to the name of the property we are modifying. It uses the Marker trait AM_Name (“Kershaw”) and the string constant “AM_Count” to arrive at “KershawAM_Count”. We ensure the boundary conditions are respected (number, 1-4). There is no Menu Command, only a Key Command (our incrAMCount) that adds 1 to the value (to a max of 4).
(The routed and eliminated units are simpler, since they each go to a single region and make a single big pile, so they only need a Send to Location that uses a Marker trait on each combat unit, that defines that unit’s leader, and hence which region to send it to if eliminated or routed).
Markers to Mirror the on-map status
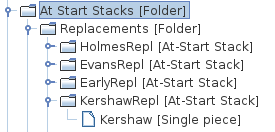
Finally we’ll end with the steps we need to mirror the on-map status of the leaders for fatigue, combat effectiveness, and replacement. Each of these reflect changes to layers in the on-map counters that we earlier showed followed the value of Global Properties that were modified by menu actions on the leader game pieces. So to reflect these changes on the Leader Board for the correct leader, we will place three informational markers on each leaders card that will display the status of one of those traits each. In order to place these markers will we use an At-Start-Stack for each that holds one informational marker. Here is Kershaw’s Stack for tracking leader replacement:
Let’s take a look at the Kershaw piece:
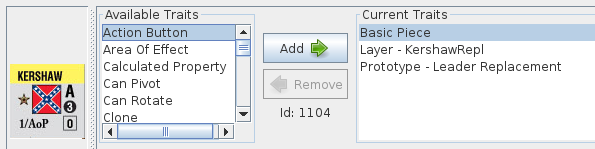
It’s a game piece that uses the Kershaw image when he is alive and a layer:
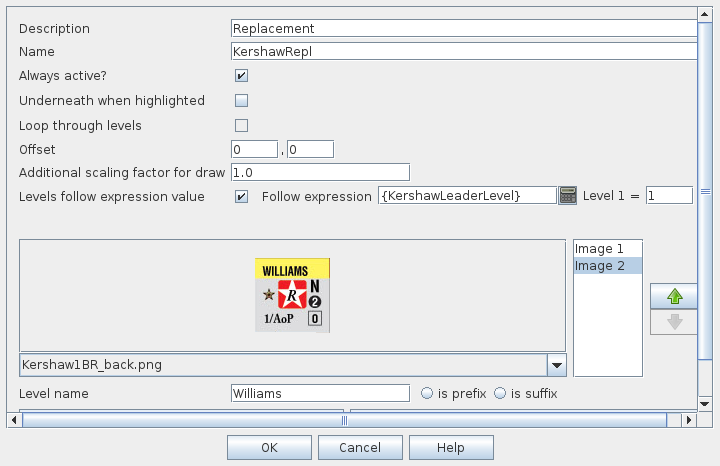
that very unsurprisingly tracks the value of the Global Property, KershawLeaderLevel, in order to track if he has been killed in battle and use his replacement counter if he has. The fatigue and combat effectiveness at start stacks define similar counters that track different layers by following the values of the Global Properties: KershawFatigueLevel and KershawEffectiveLevel.
Conclusion
Congratulations! You made it to the end of my little 3-part tutorial. I hung out on the VASSAL module design discord bothering the maintainers and promised if they helped I’d write a tutorial so other people wouldn’t have to ask them the same questions all over again. Hopefully, some of the information I’ve included in here will be useful for someone. Hopefully it’s been fun to read. Please consider writing up your efforts to do interesting things with VASSAL as a tutorial for others so that we can share ideas and make all our modules more interesting and fun to play. Grab me if you want a PBEM of 1st Manassas sometime!